


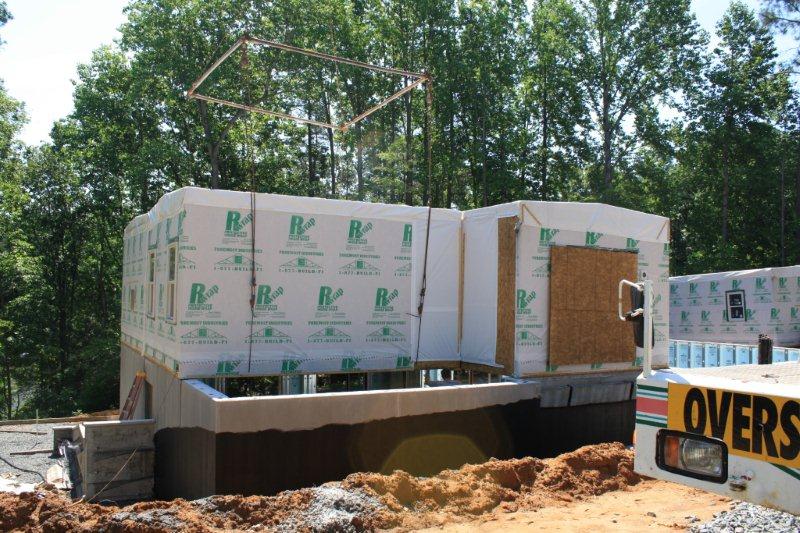
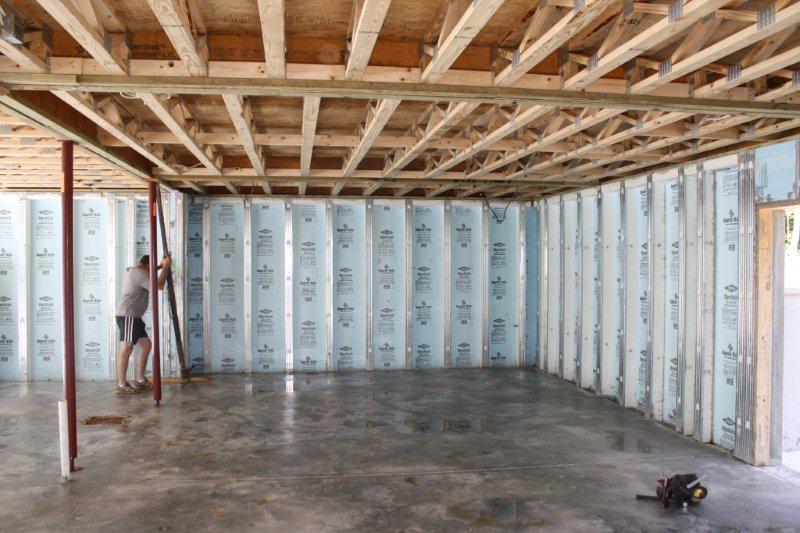
Setting the Boxes
Setting the Modules On Our Basement Walls
.
May 31, 2012
.
All these pictures and all the work was done on the 31st --
the trucks/boxes were there when we got there but... the workers showed up on the
lot at 8:30 am and they were finished and on the road home by 12:30 PM
.
.
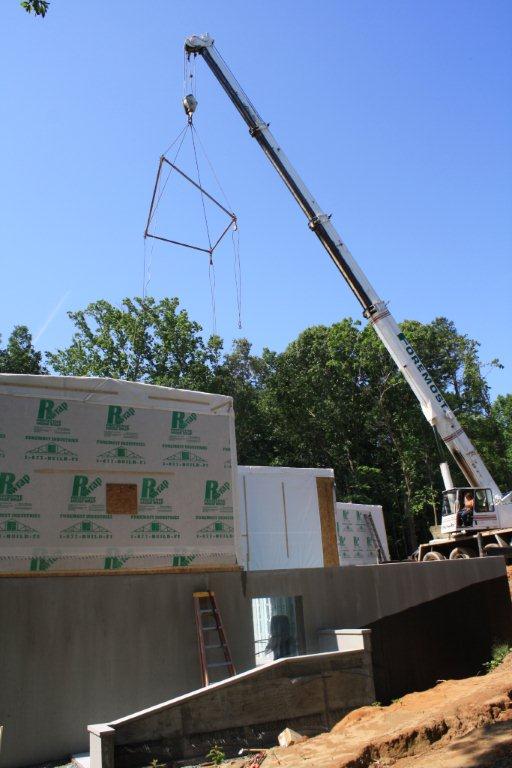
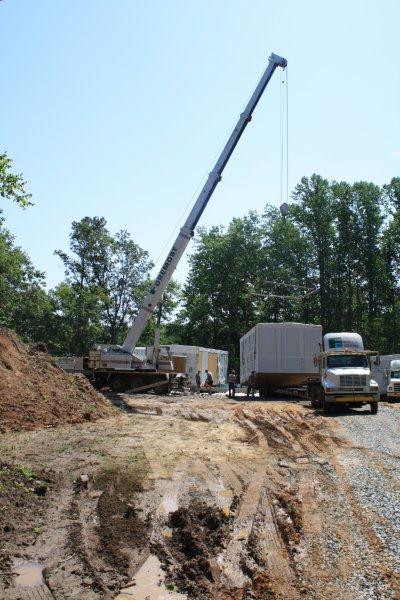
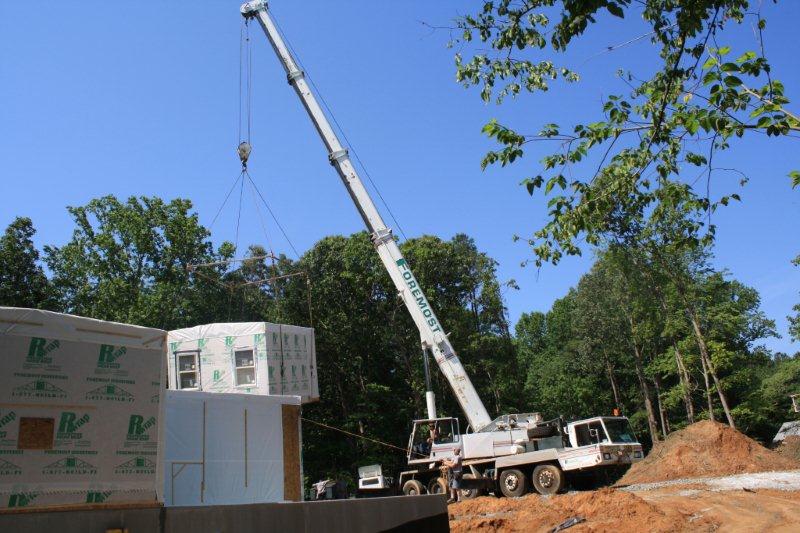
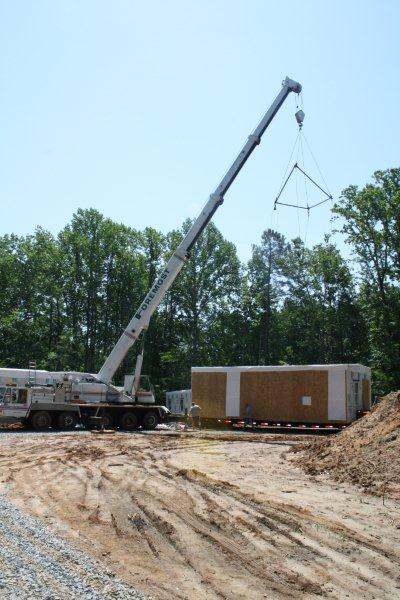
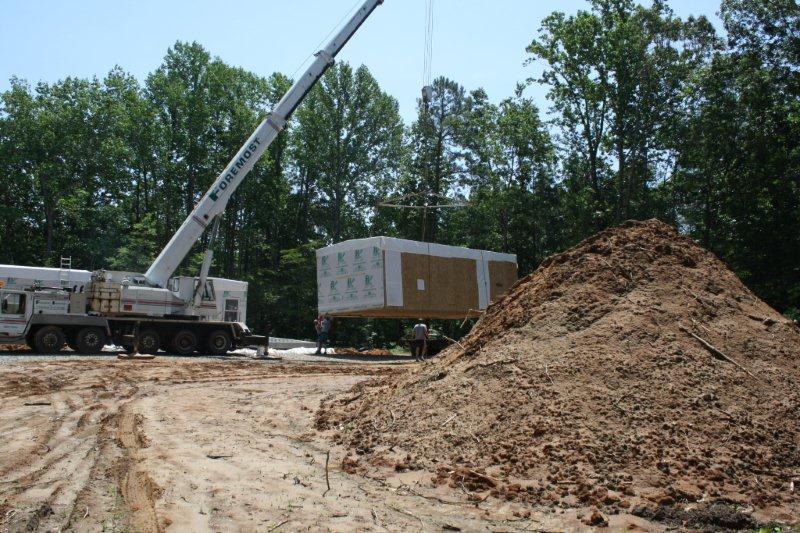
------------Preparations -----------
.
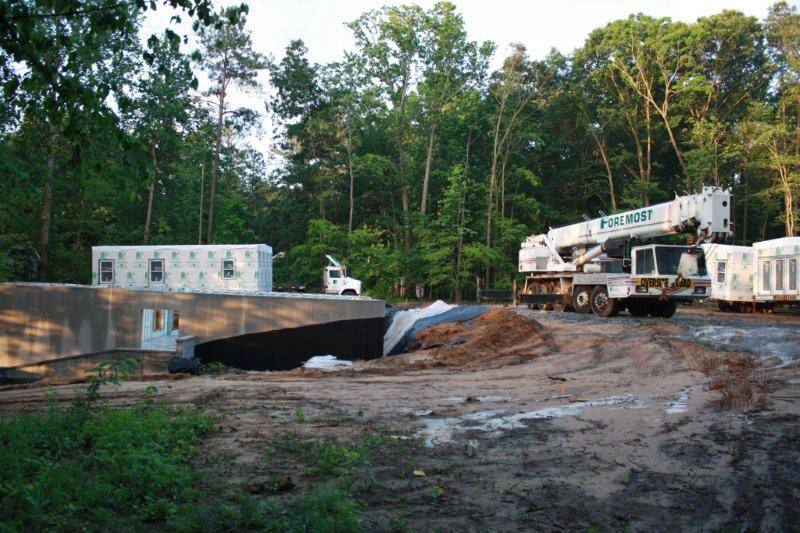
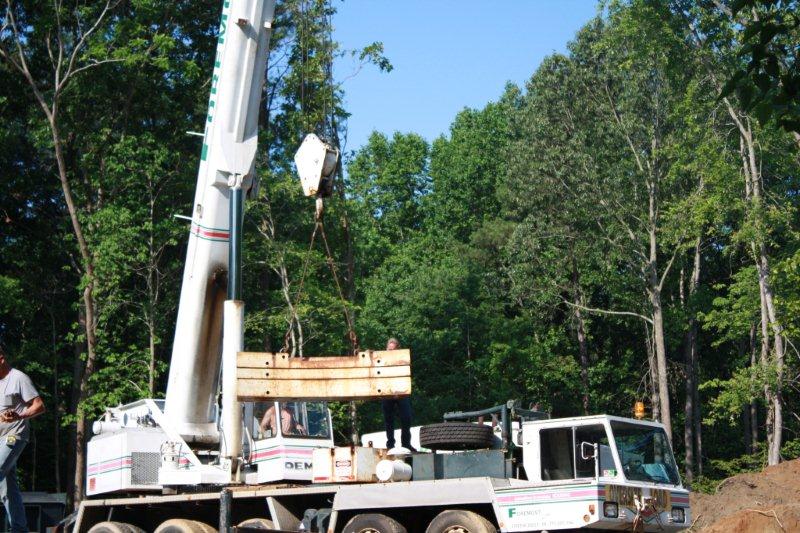
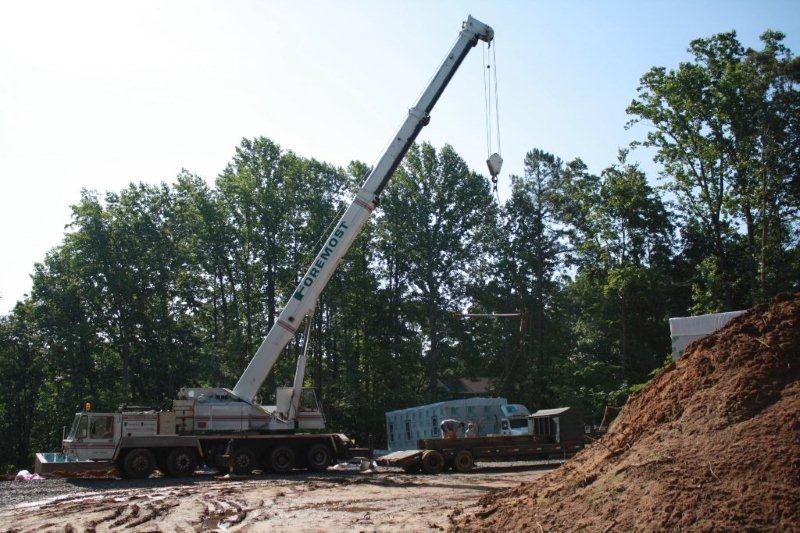
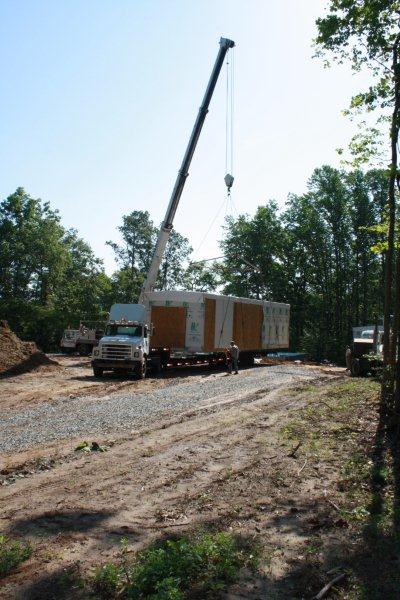
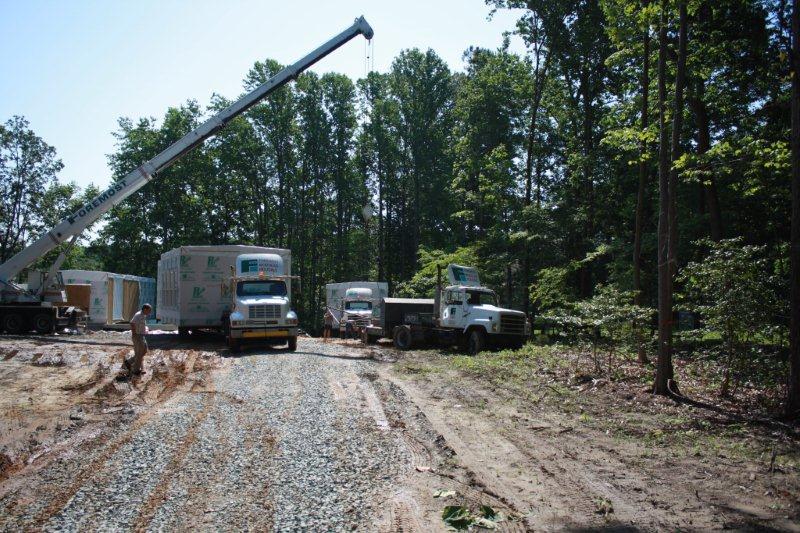
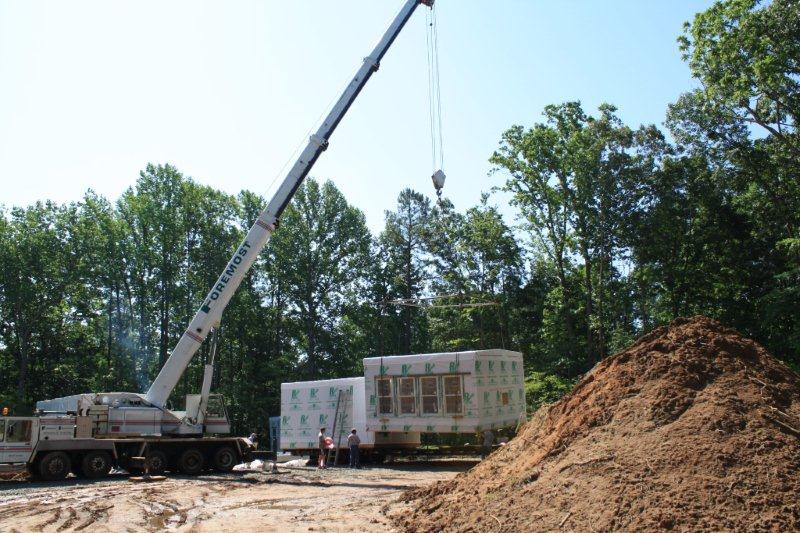
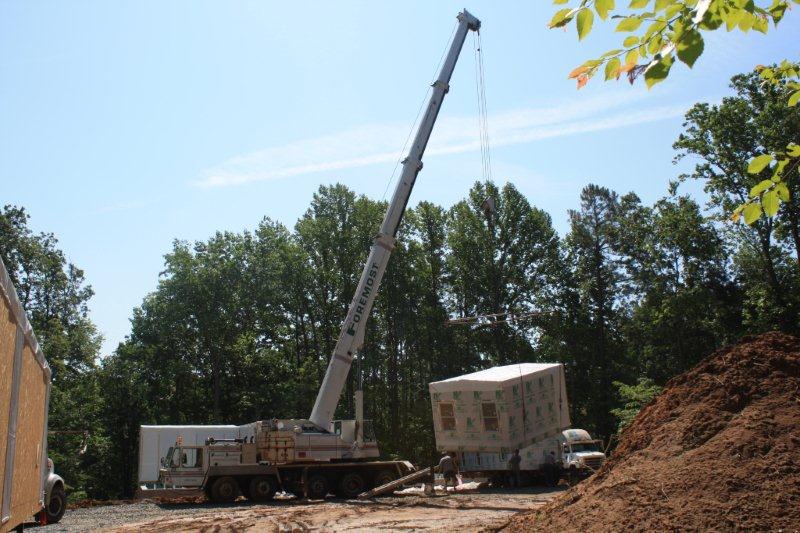
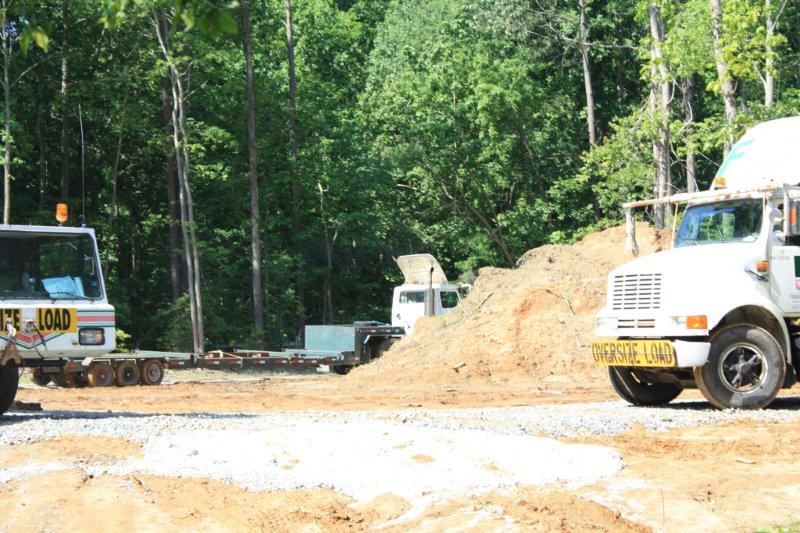
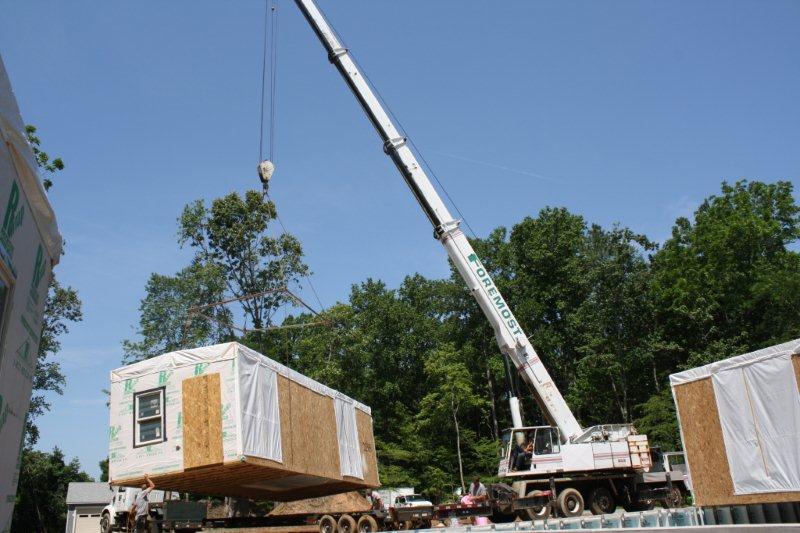
These pictures show what the lot looked like when we showed up
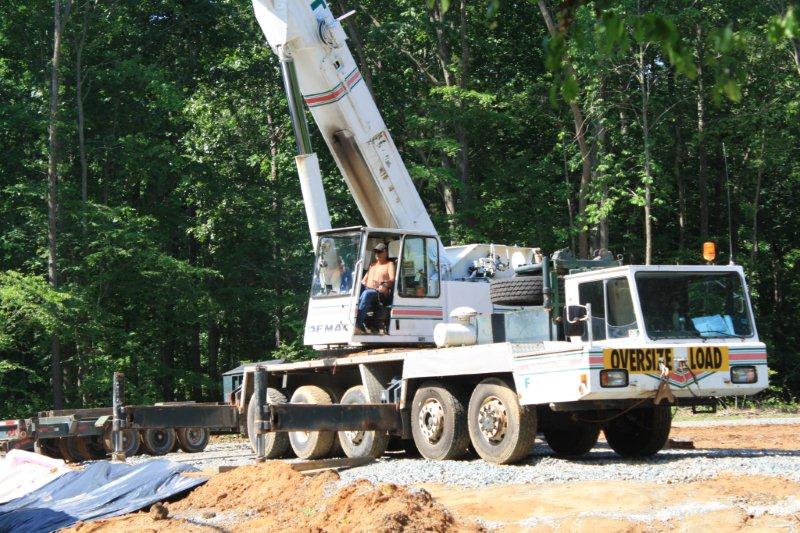
(a trailer lot)and setting up the crane to pick the boxes up
.
These first six pictures show what the lot looked
like when we showed up - first 5 are before the even started; in the sixth picture
you can see they actually had the crane going
.
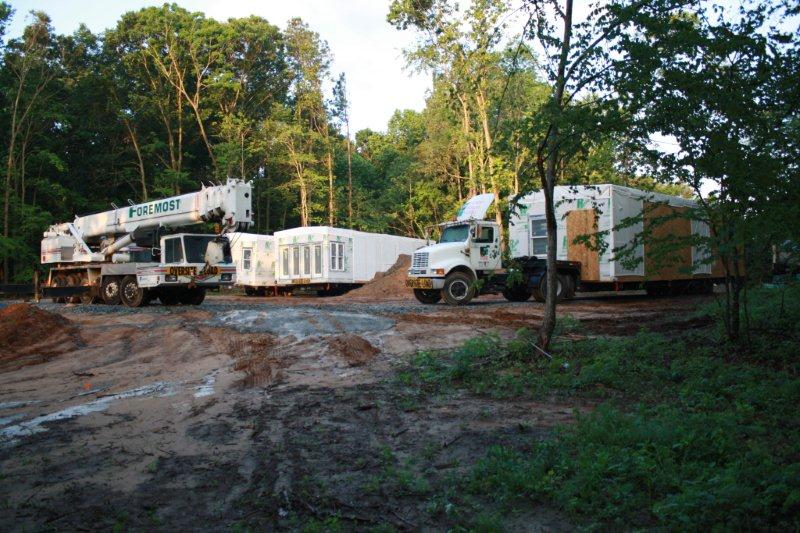
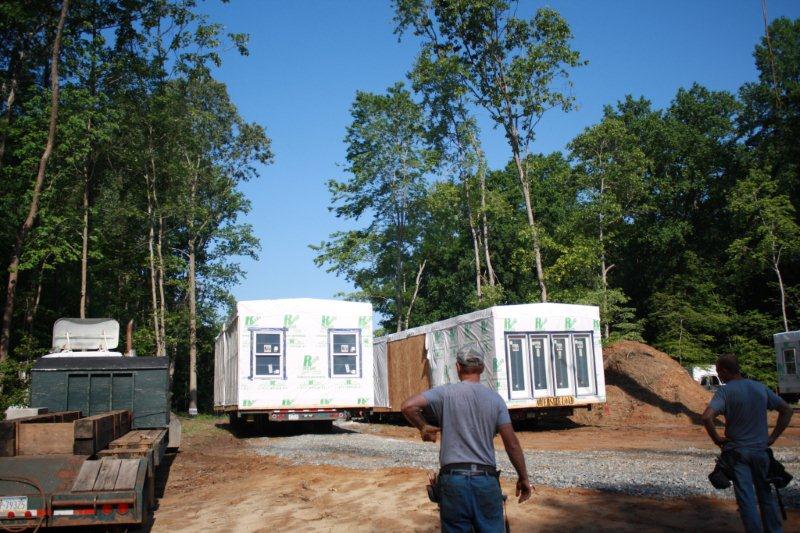
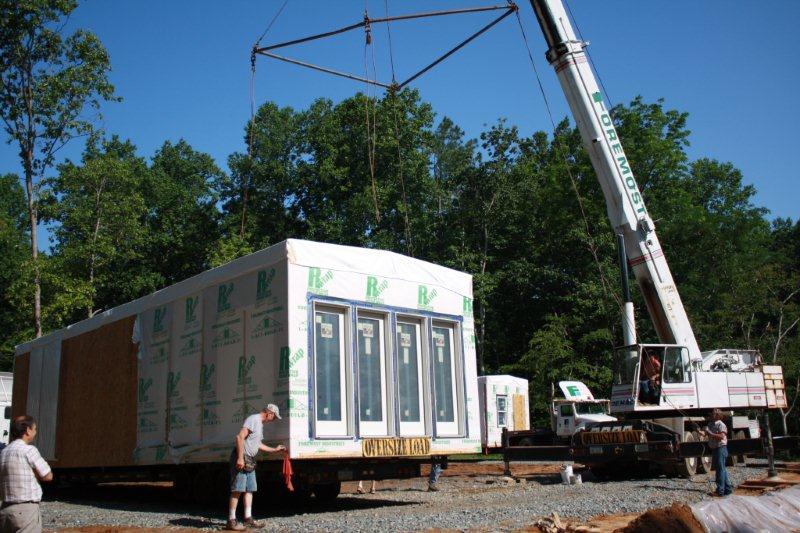
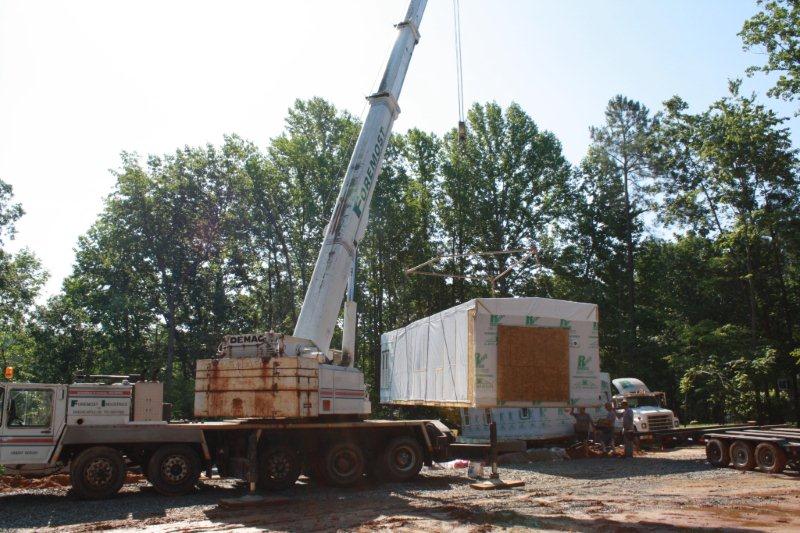
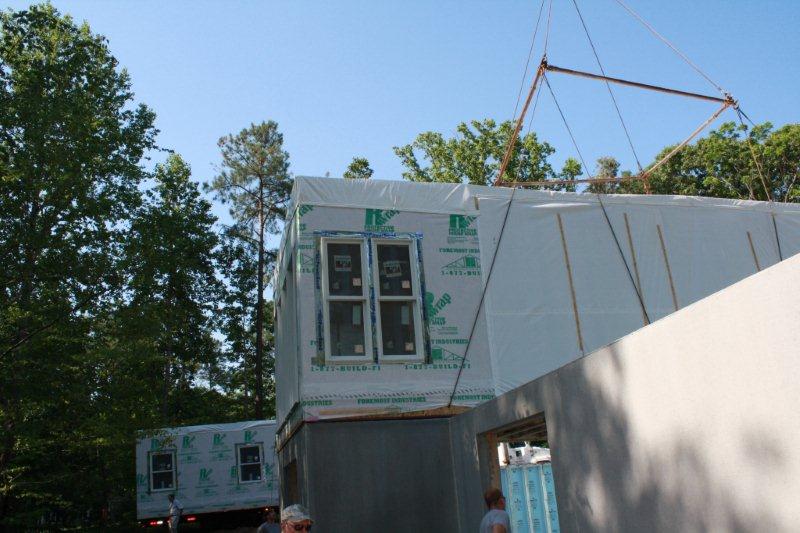
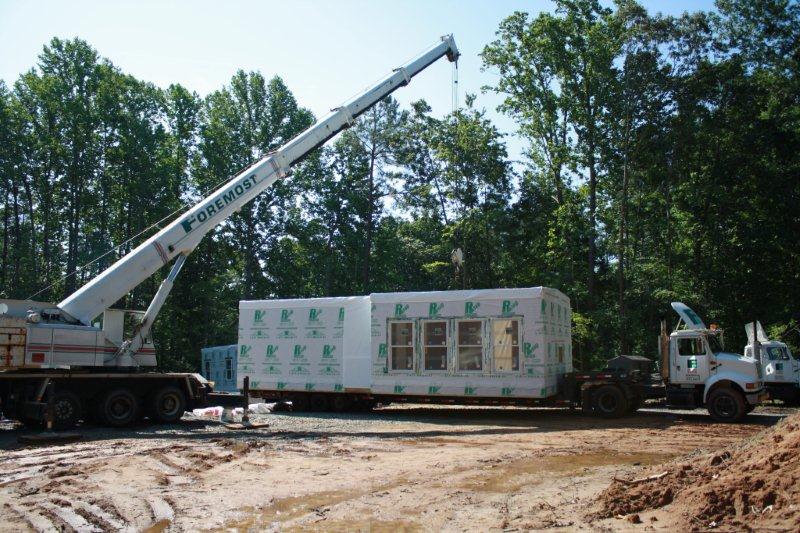
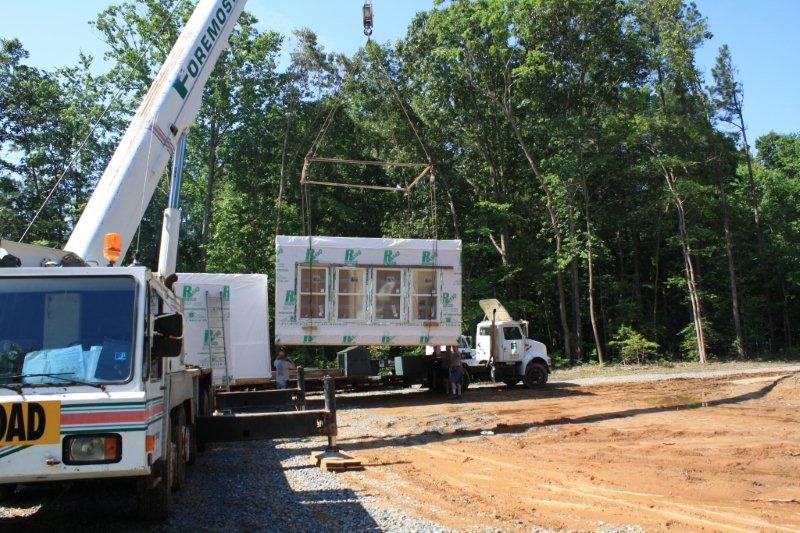
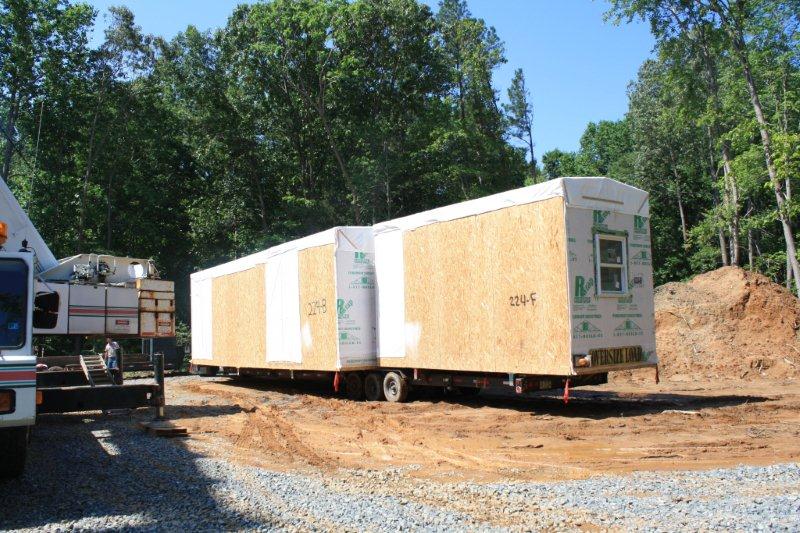
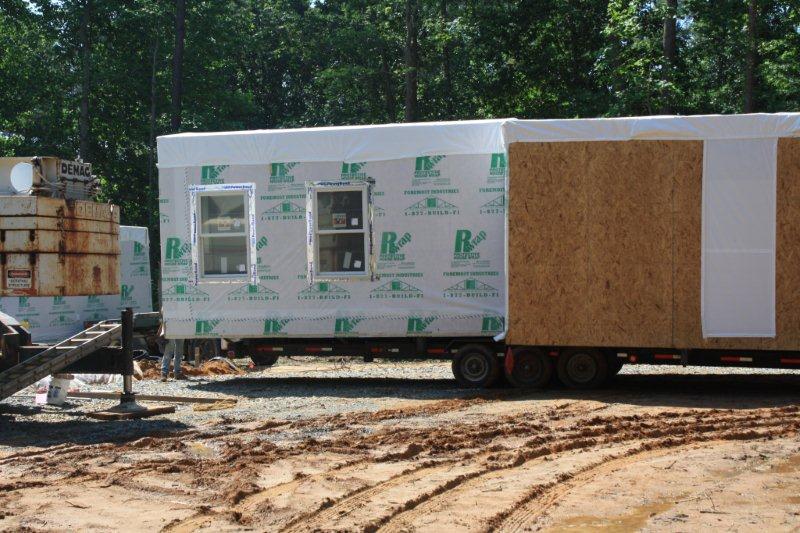
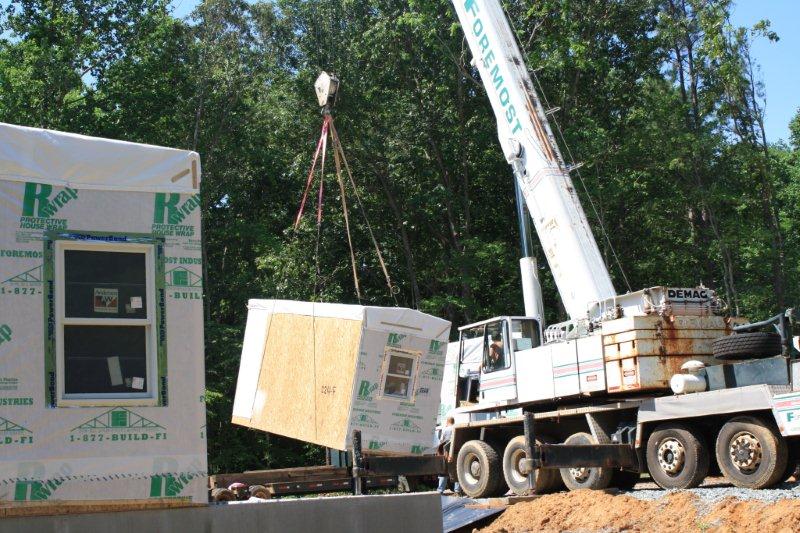
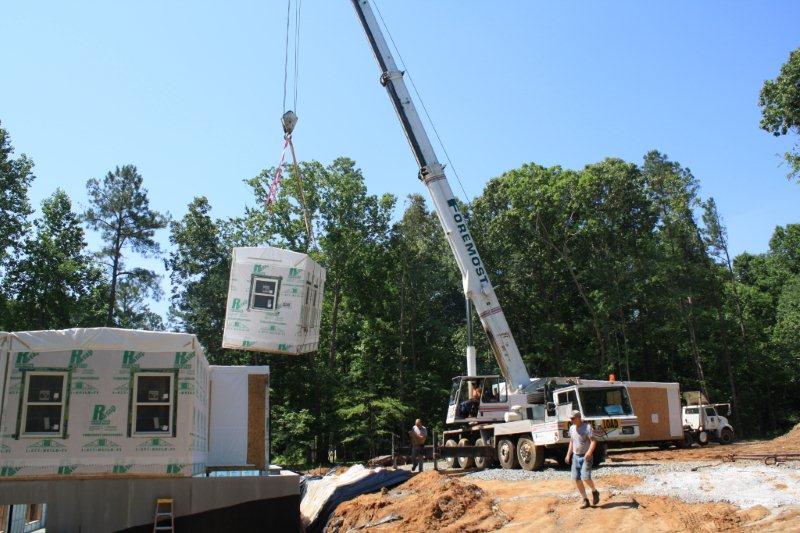
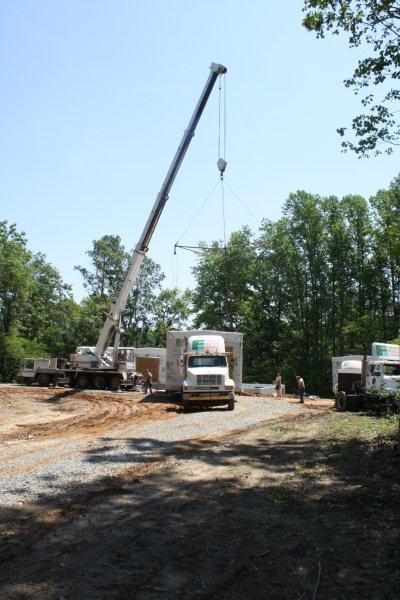
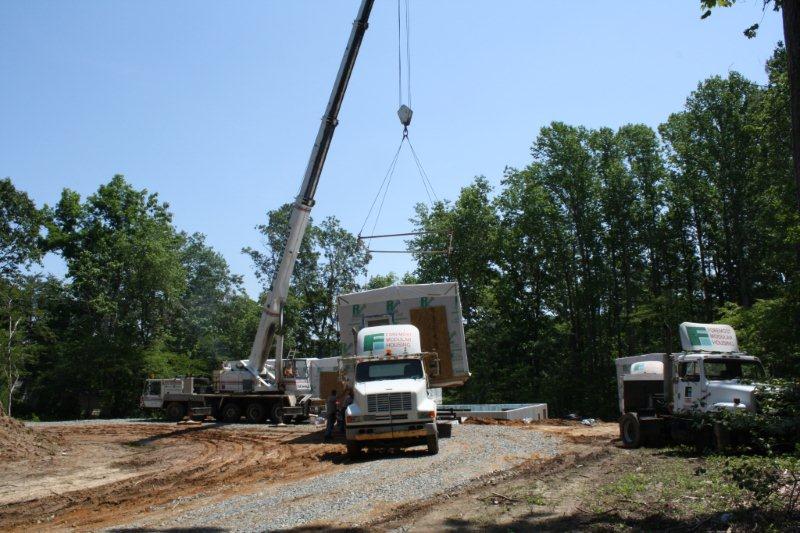
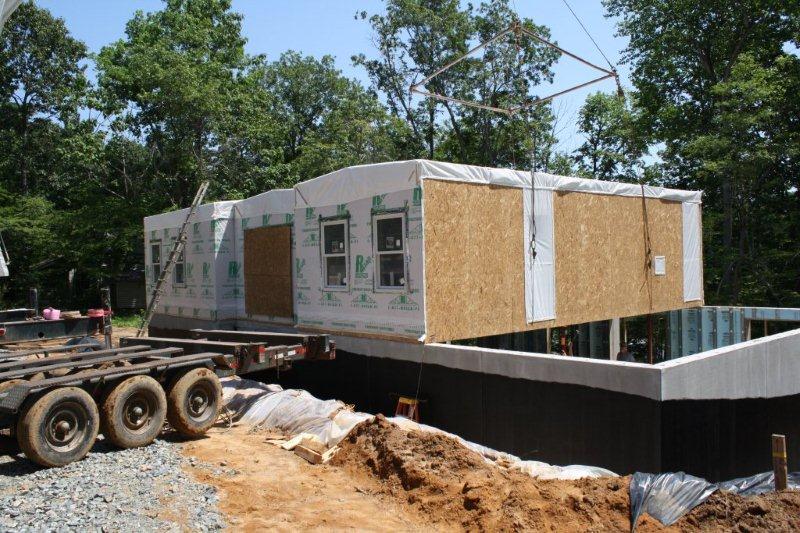
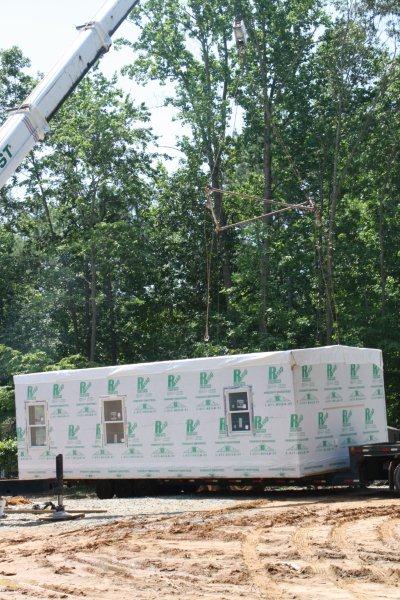
The crane is parked in front and you can see three
of the four trucks. The truck on the right has the box #2 (office plus) and
on the back of the truck the Mud room/WIC. The truck in the middle has the
kitchen/sun room (you can see all of the windows); and the truck you can barely
see has the Living Room and Dining Room
.
You can see the crane and off to the left is the
Master Bedroom/Bathroom box
.
Close up of the back of the Sun Room and on the other trailer
is the Dining Room (on the back) and the Living Room (the Living Room was the widest
module)
.
Another shot of the Bedroom on the side of the house
.
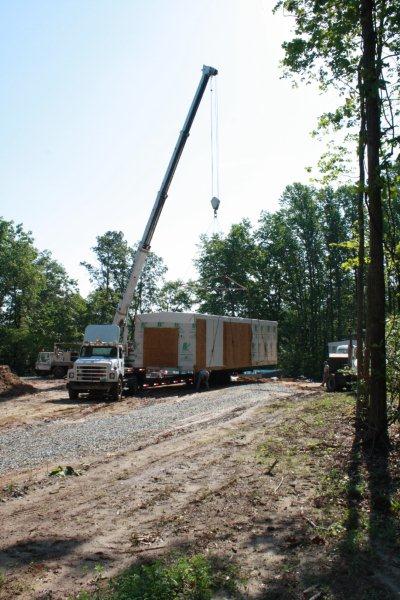
The same two trucks and off to the left is the
truck with the counter weights (when this picture was taken, the counter
weights had already been taken off
.
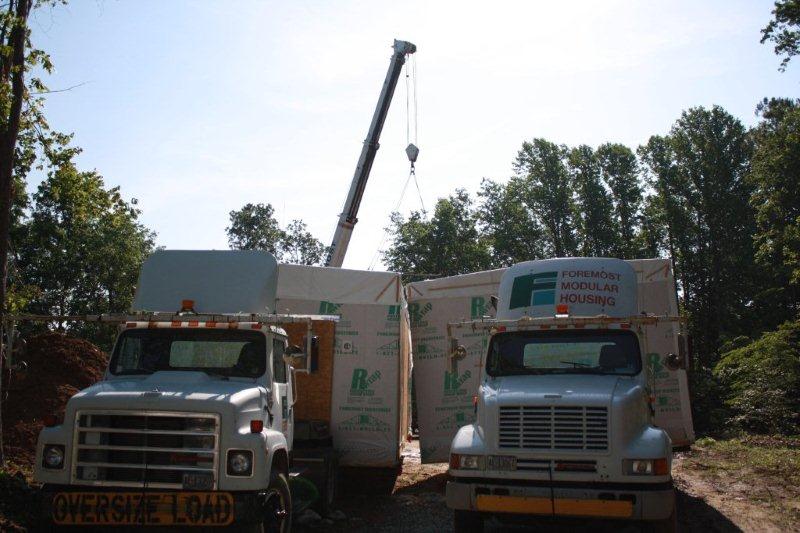
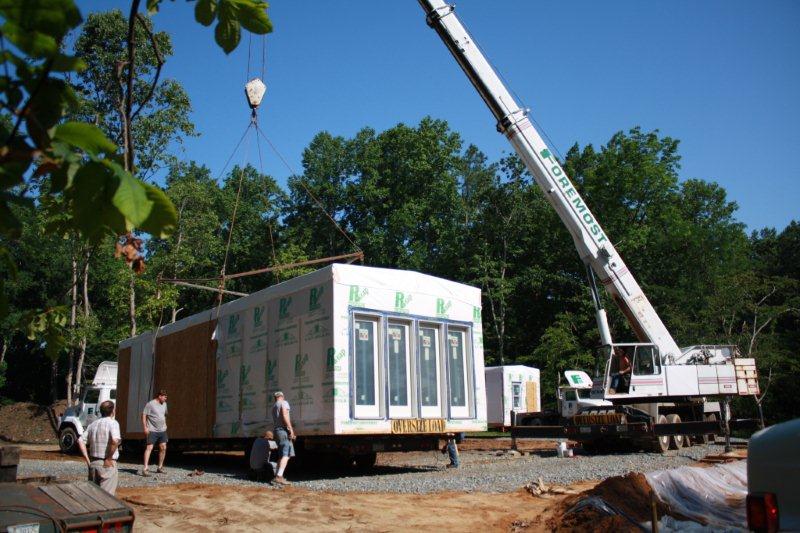
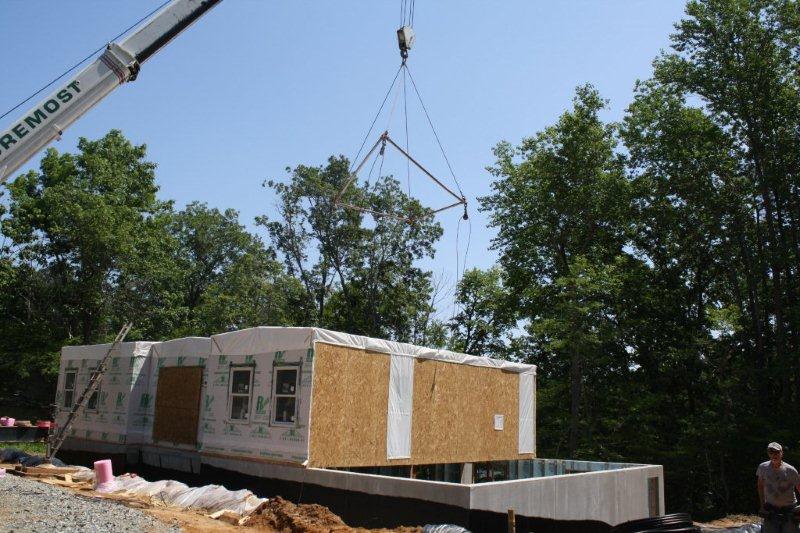
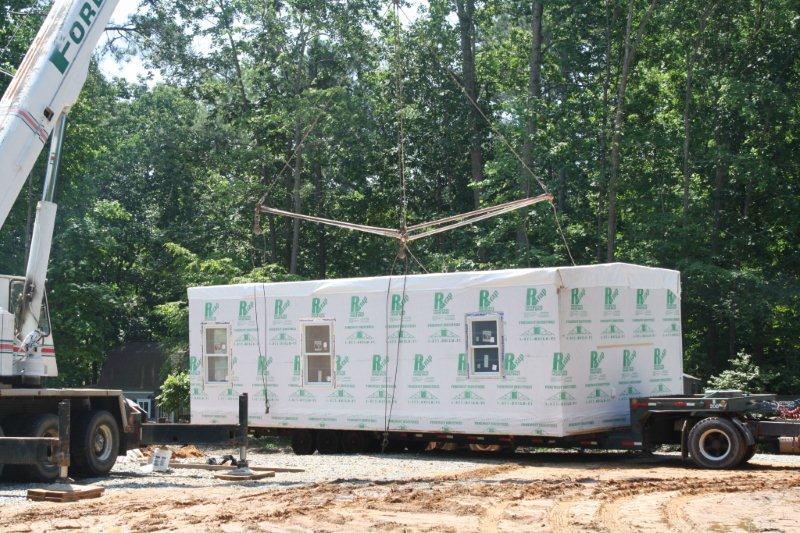
This is a picture of the two trucks side by side (from
the front) -- you can see the crane has already been set up and the boom is
up in the air
.
.
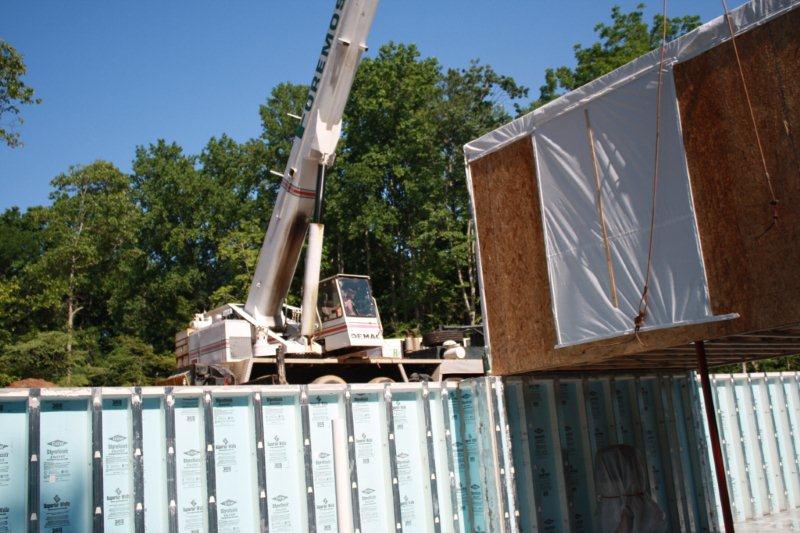
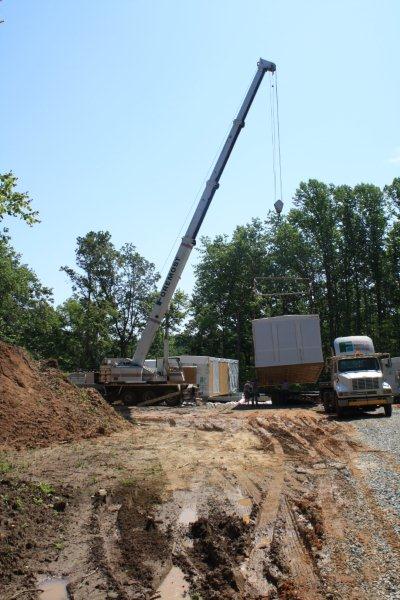
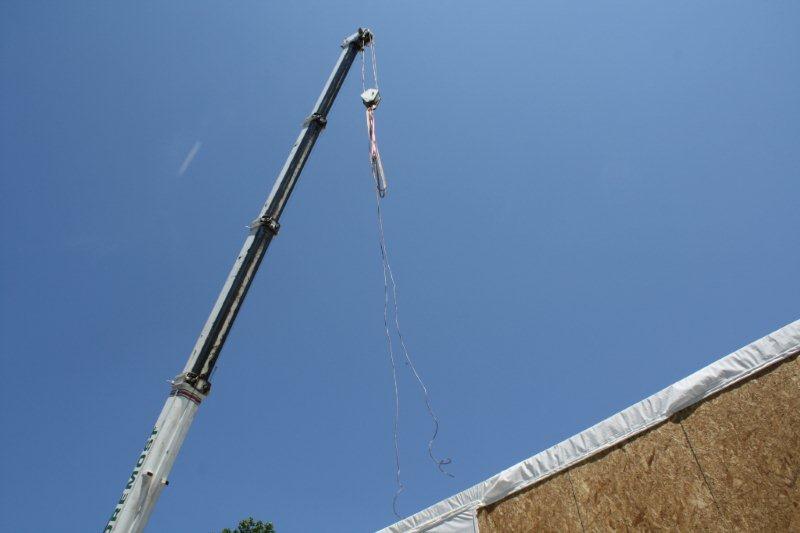
These next six pictures are the crain setting up - they
are putting on the counter weights
.
You can see the counter weight on the end of the hook
.
....
 .........
Couple of more pictures setting and getting counter weights
.
Counter weight
.
Counter weight
.
Counter weight
.
.
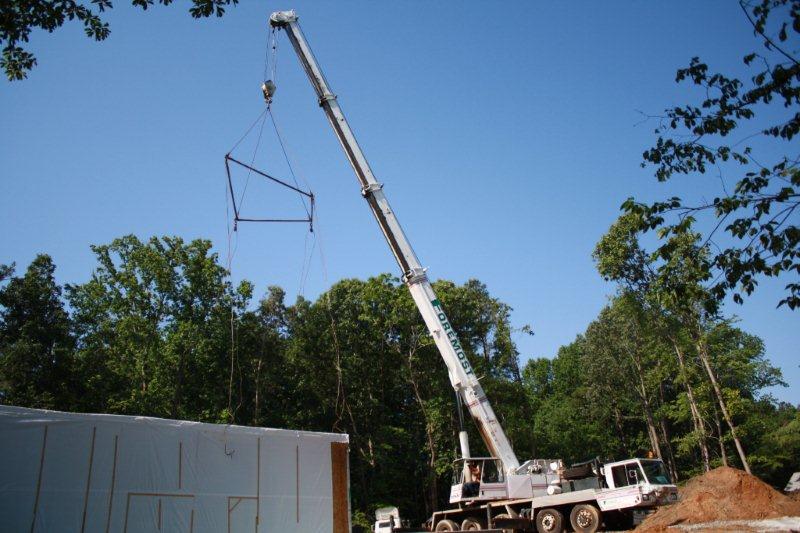
The last of the "prep pictures" are the guys
setting up the spreader bar
.
Picking the pieces of the spreader bar off of the truck
.
Moving the piece over
.
Putting the pieces together
.
....
 .........
Spreader bar is ready to go
.
.
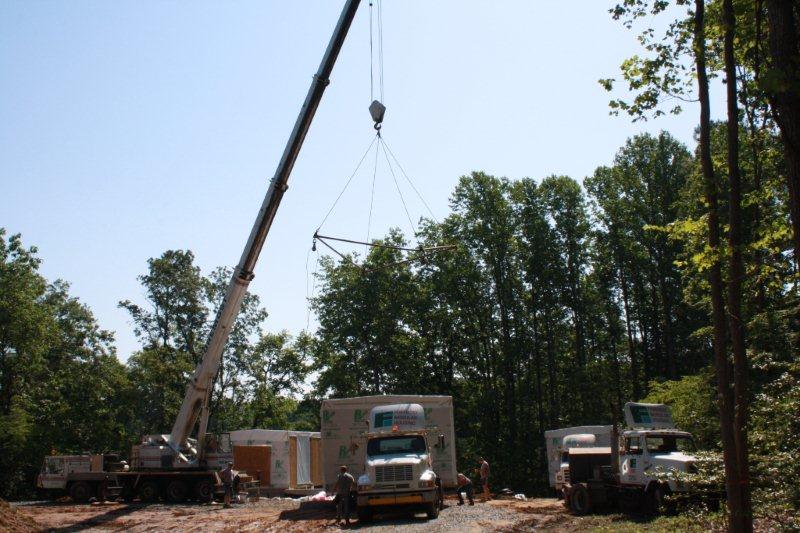
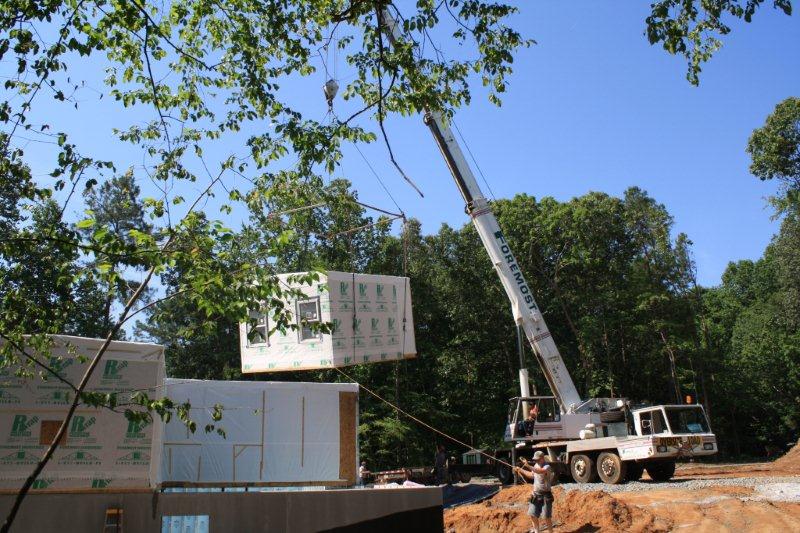
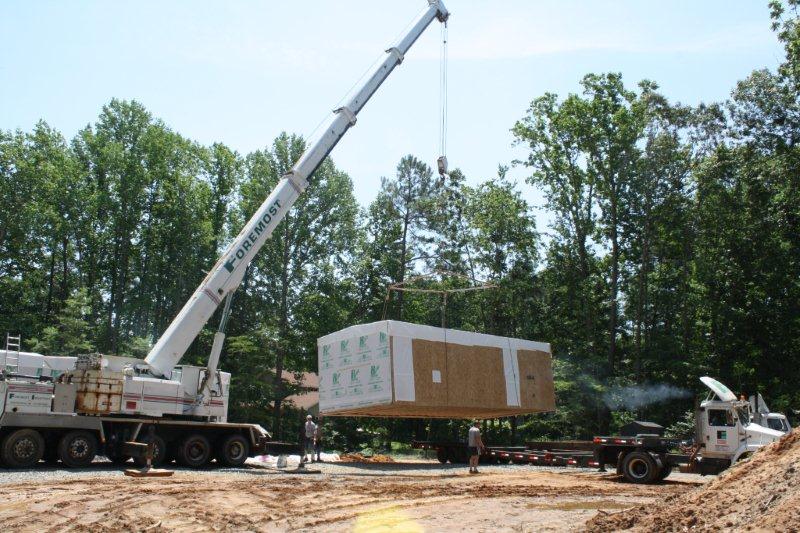
------------Setting the Kitchen Module -----------
.
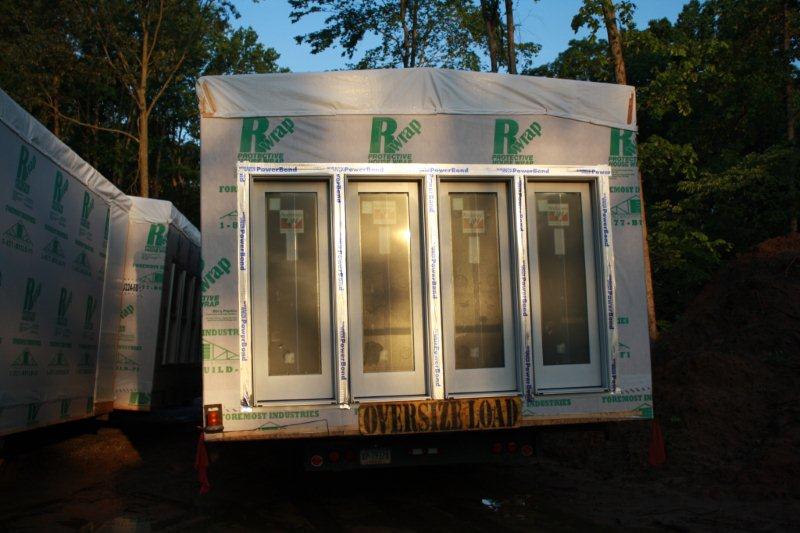
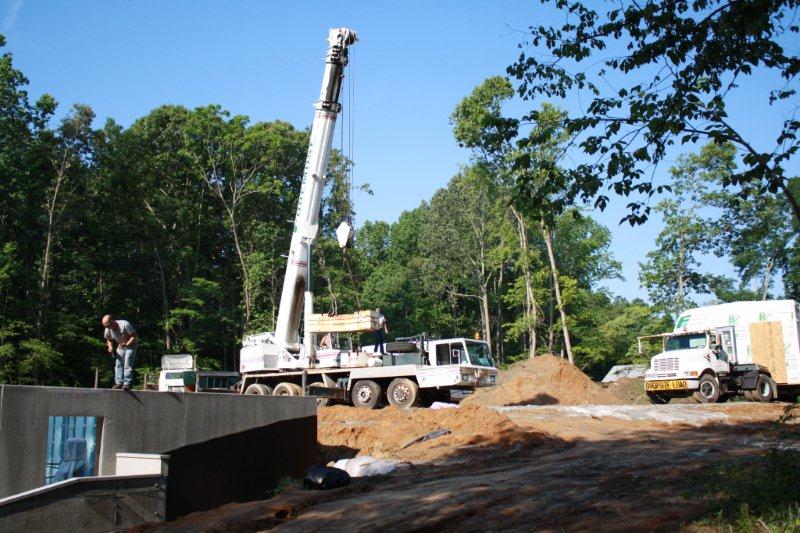
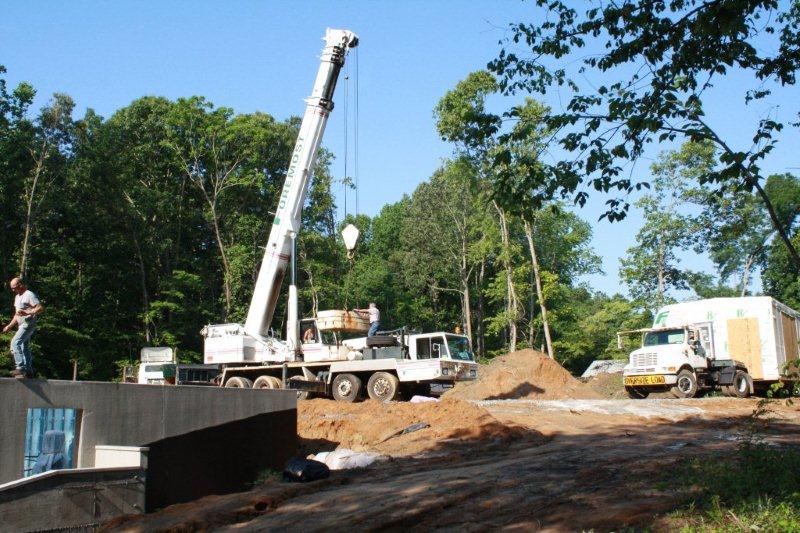
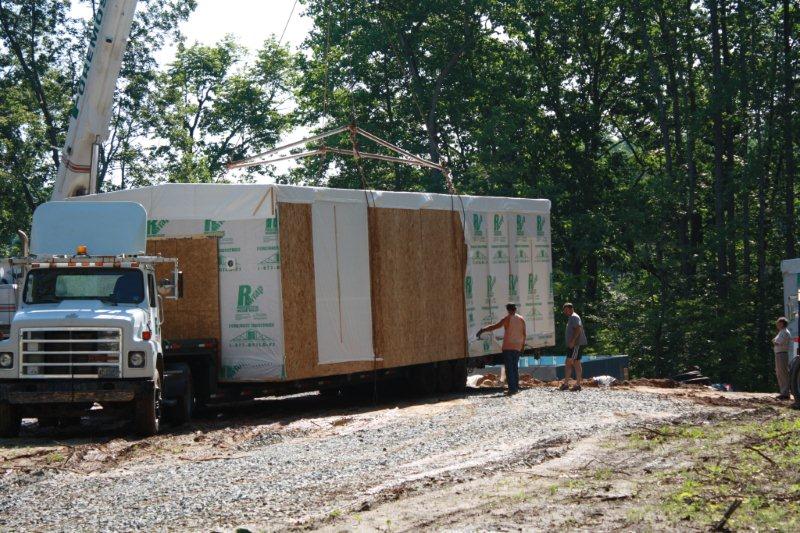
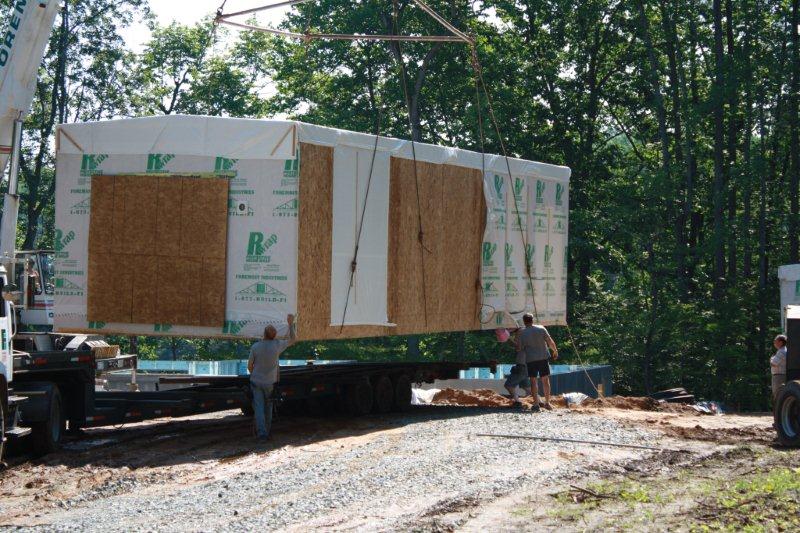
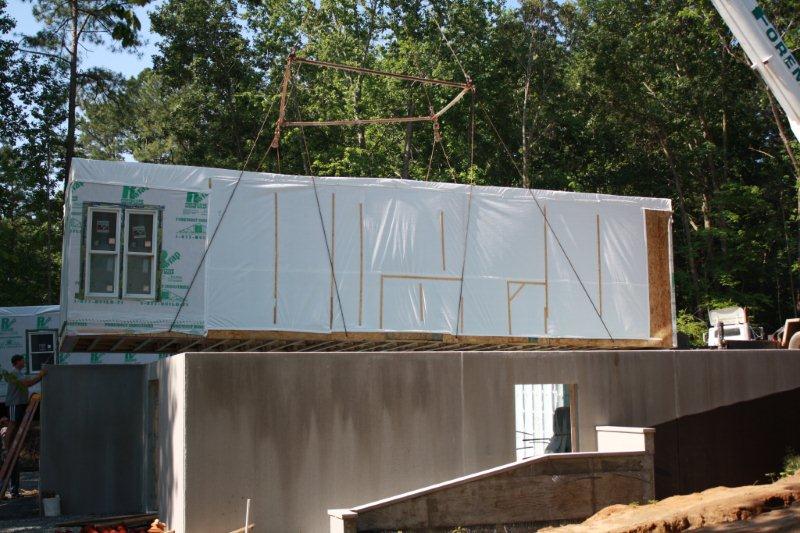
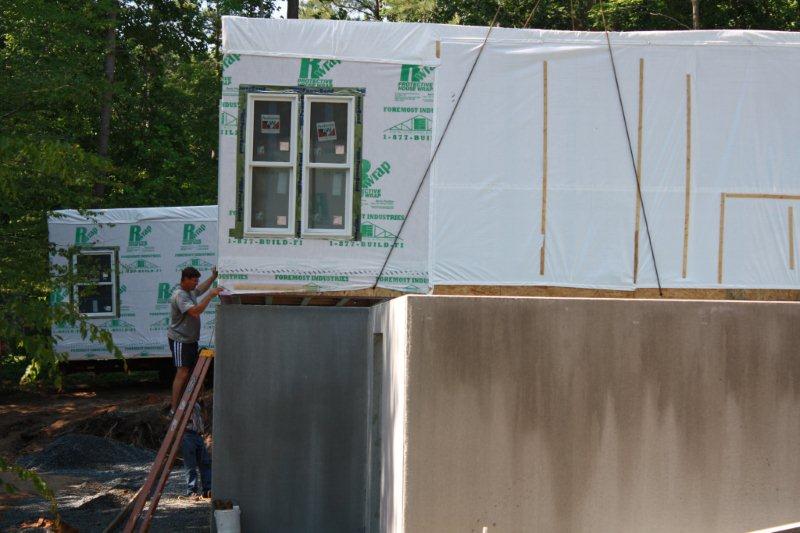
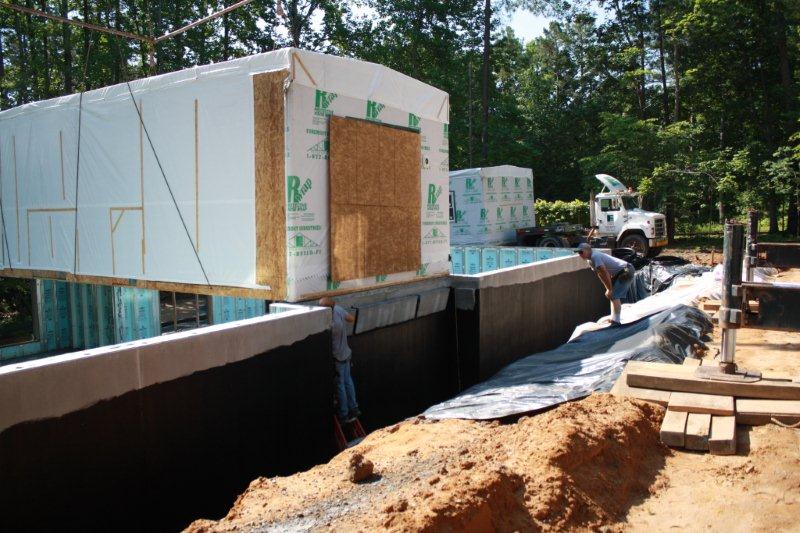
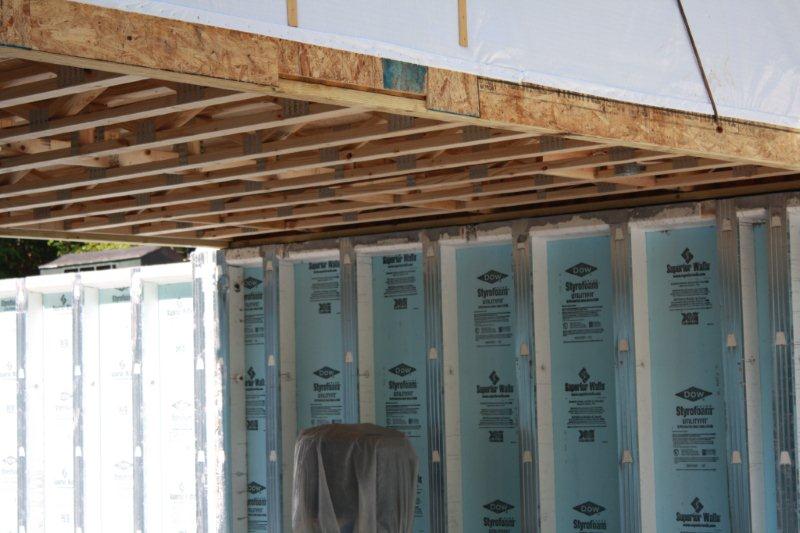
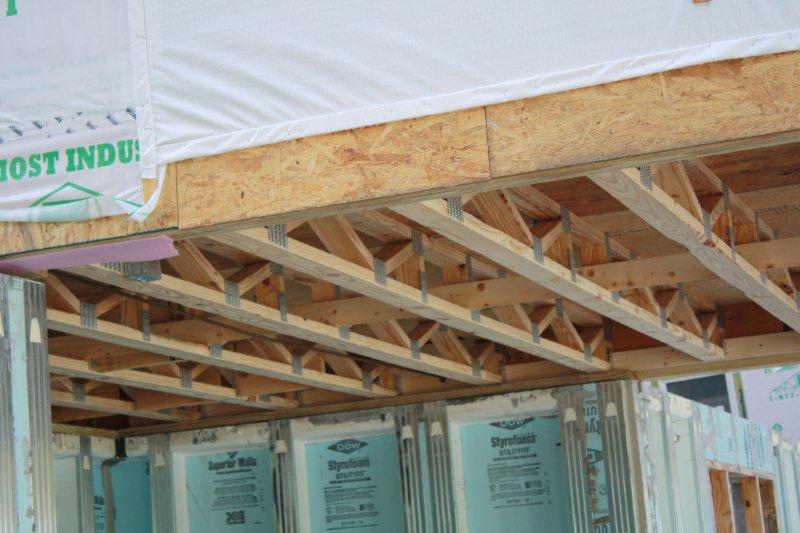
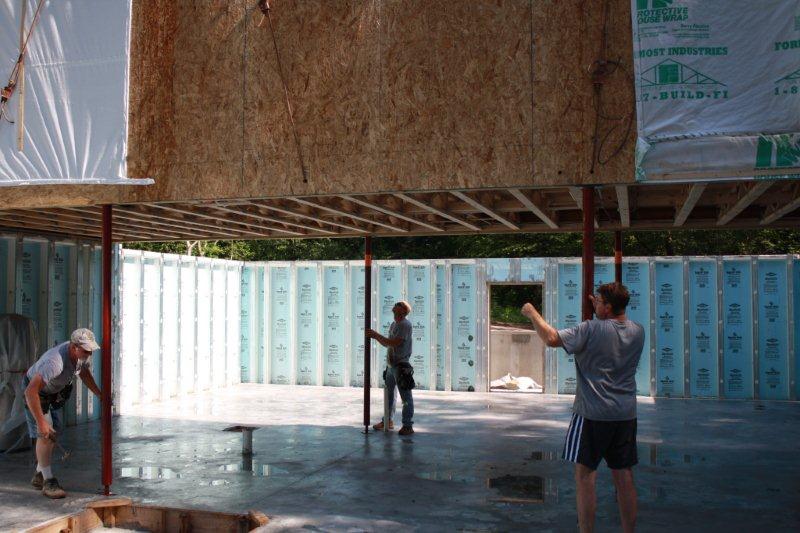
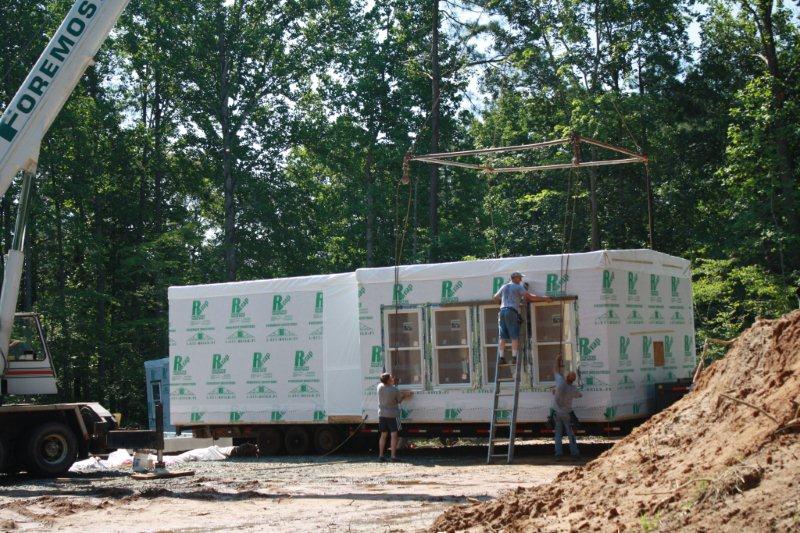
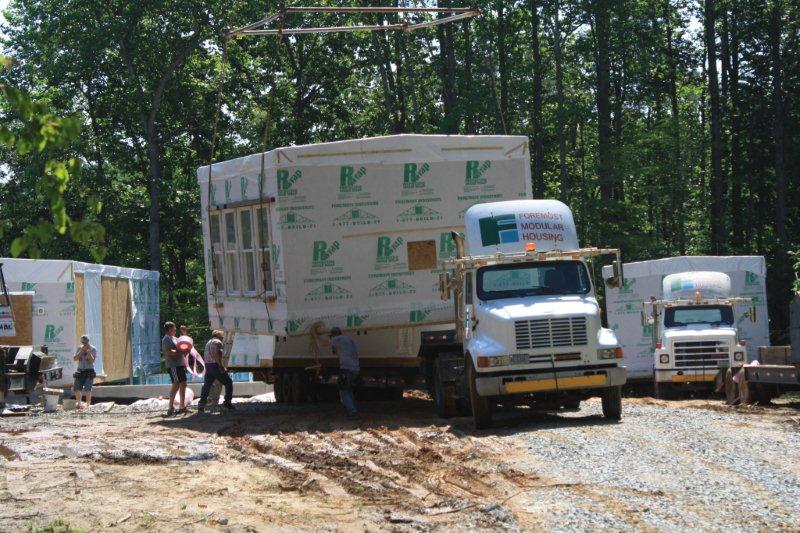
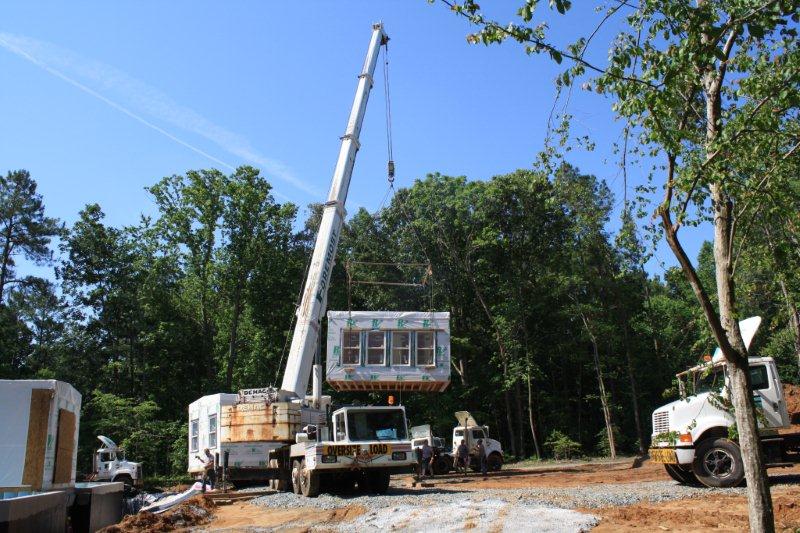
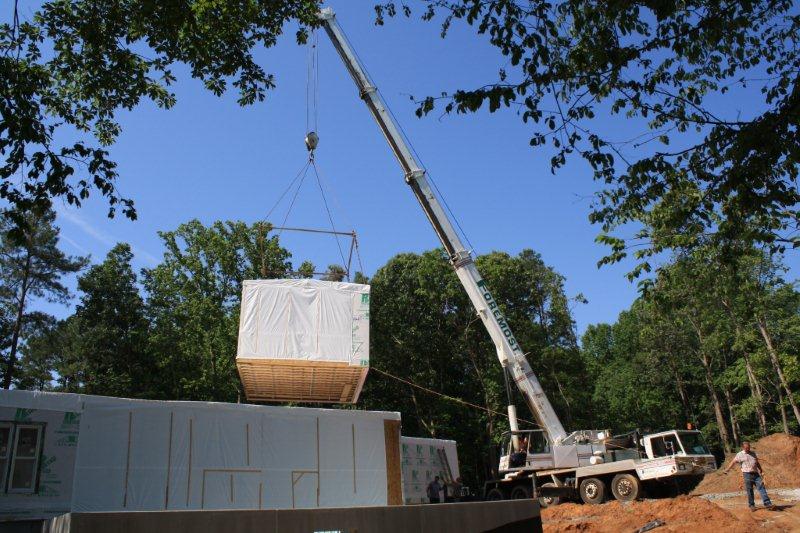
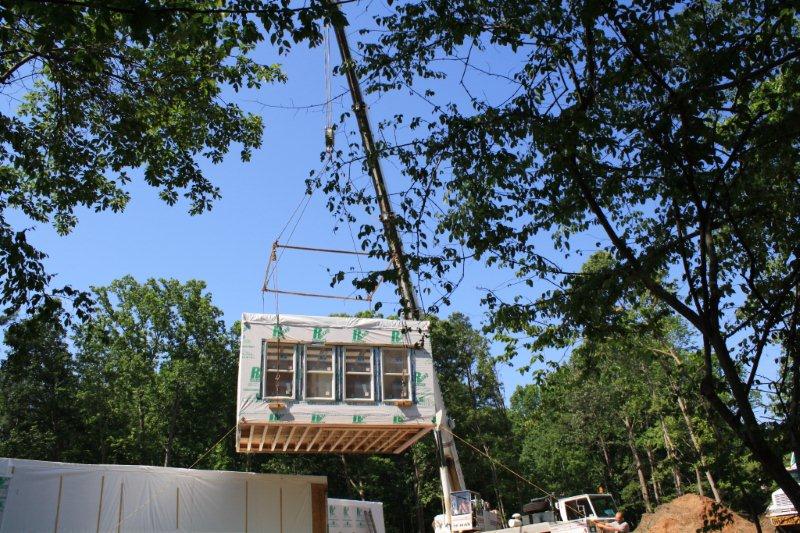
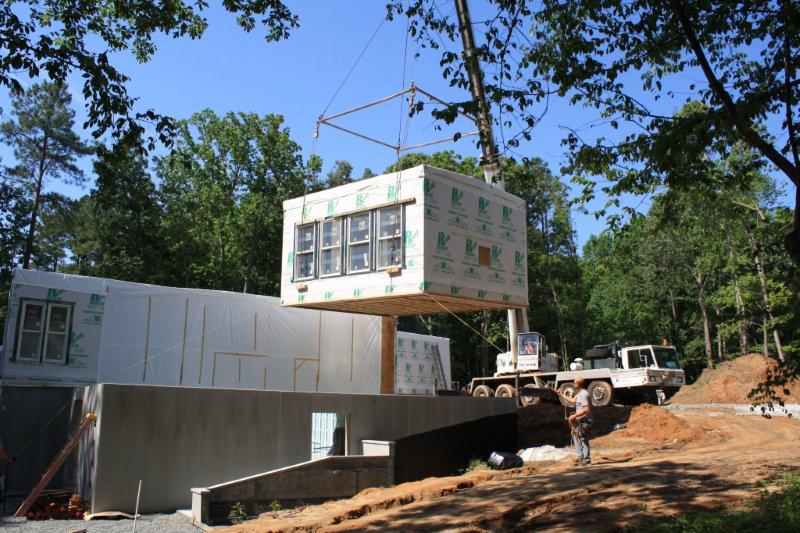
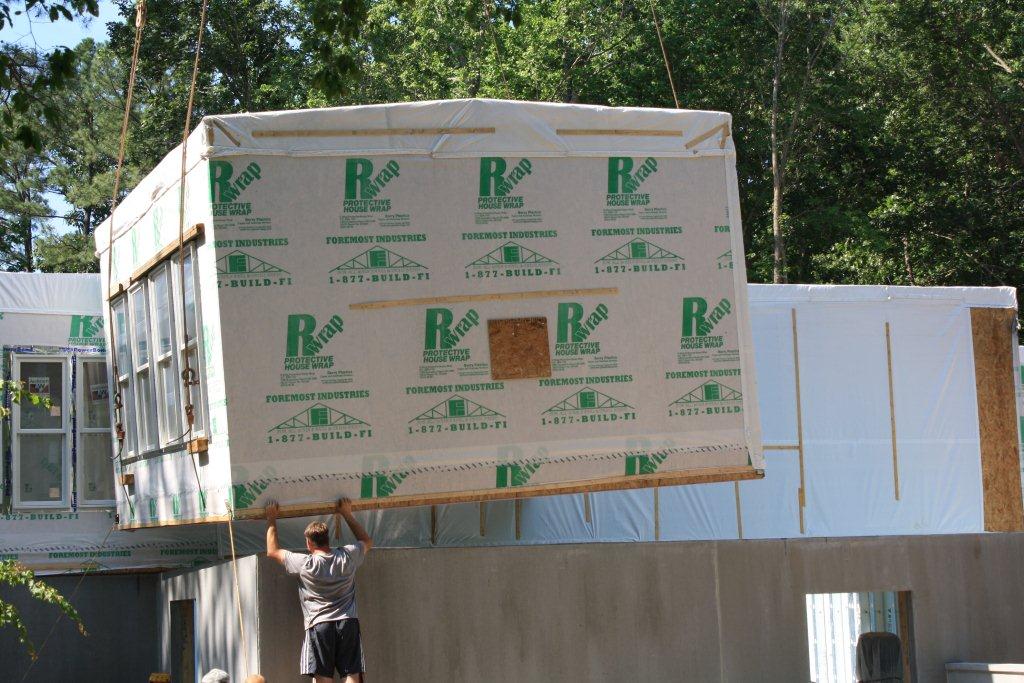
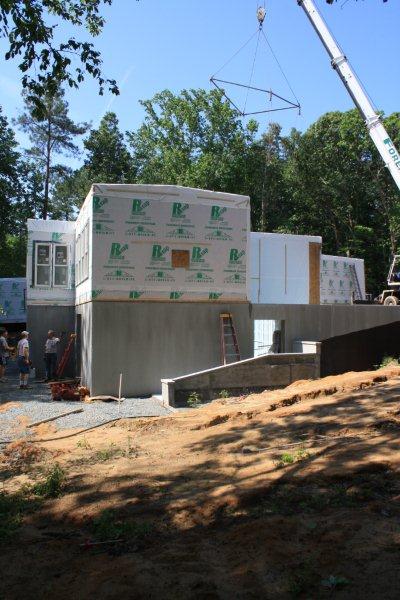
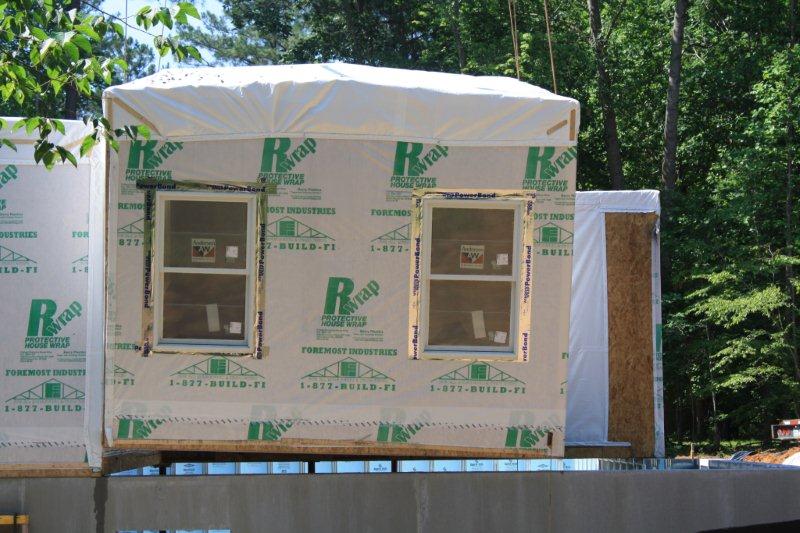
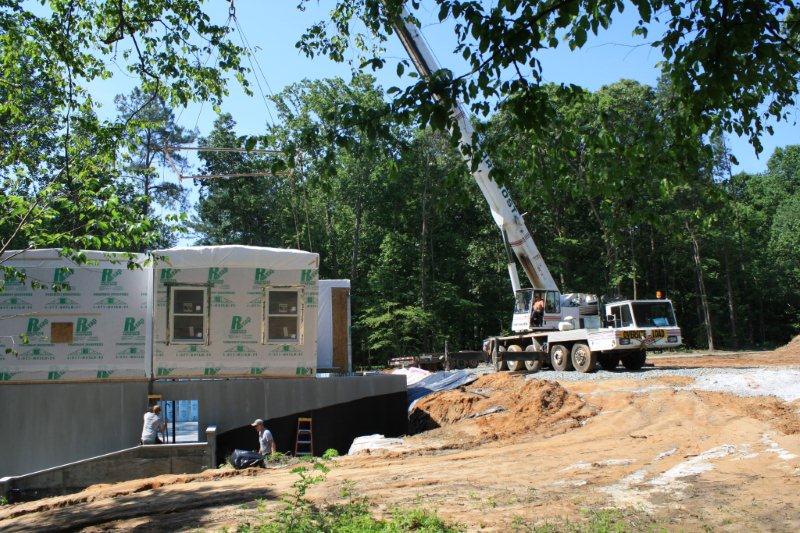
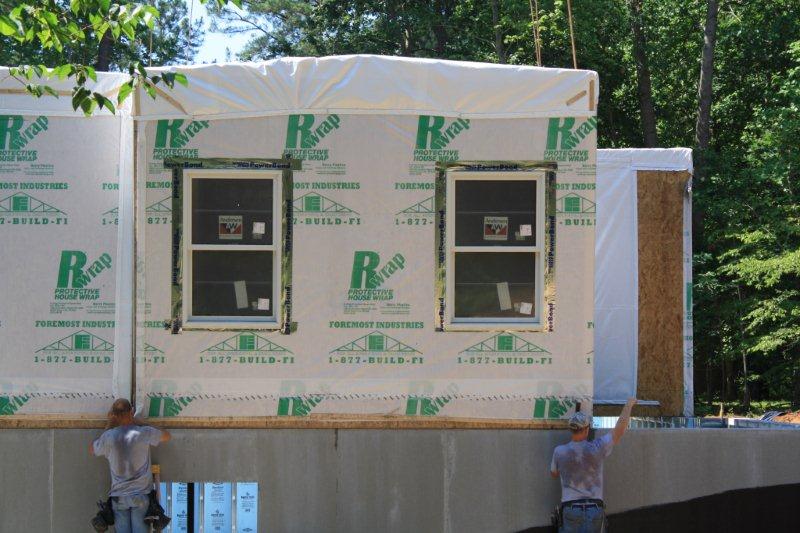
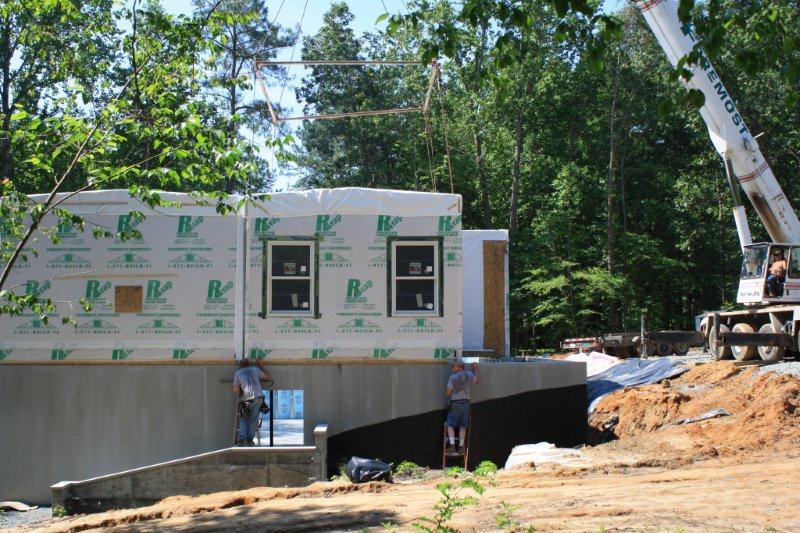
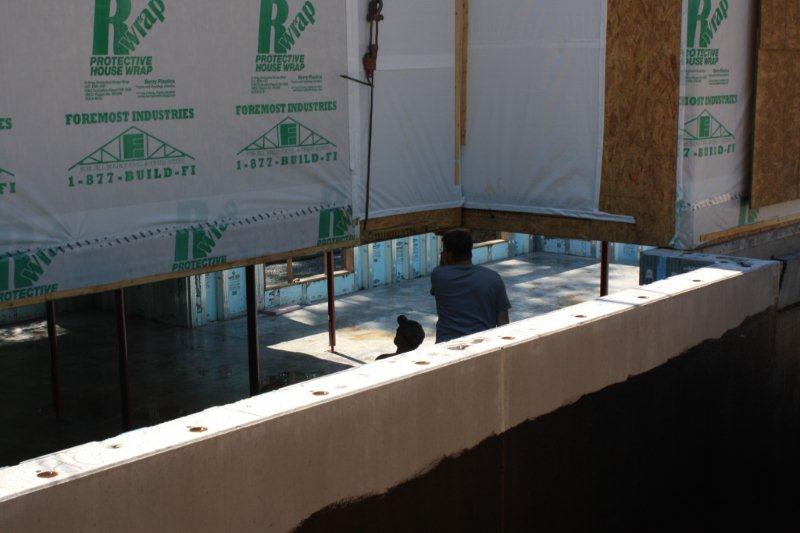
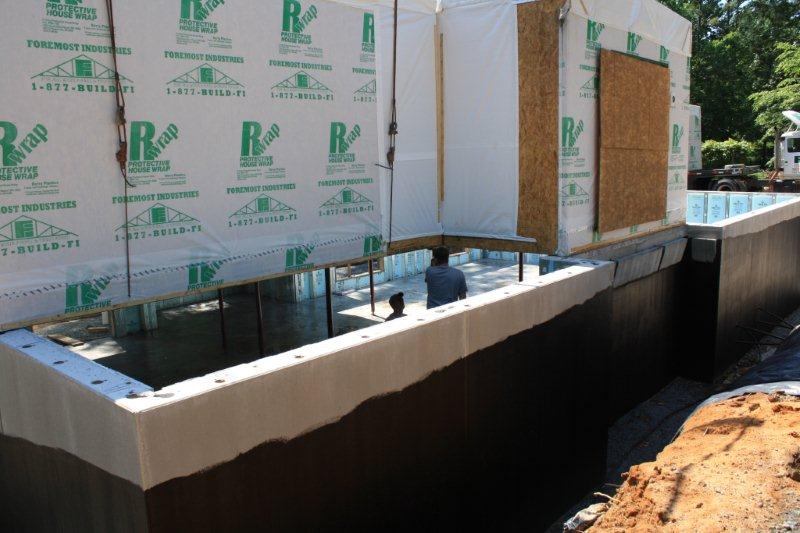
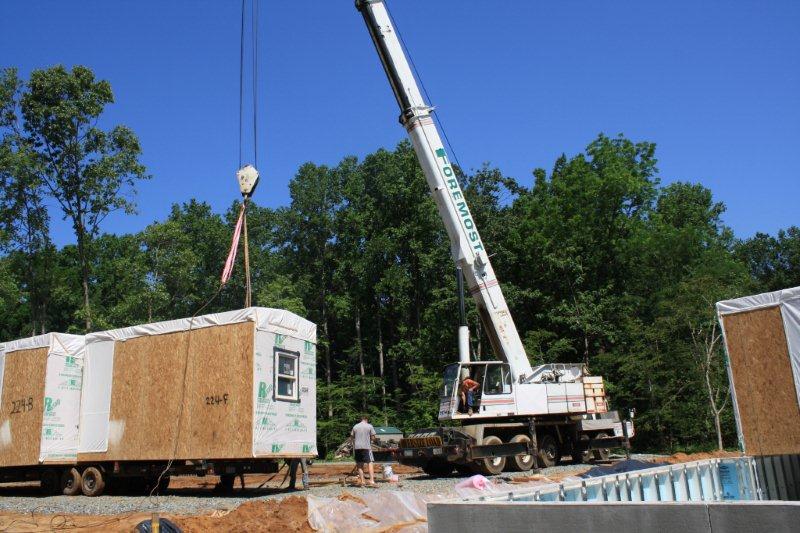
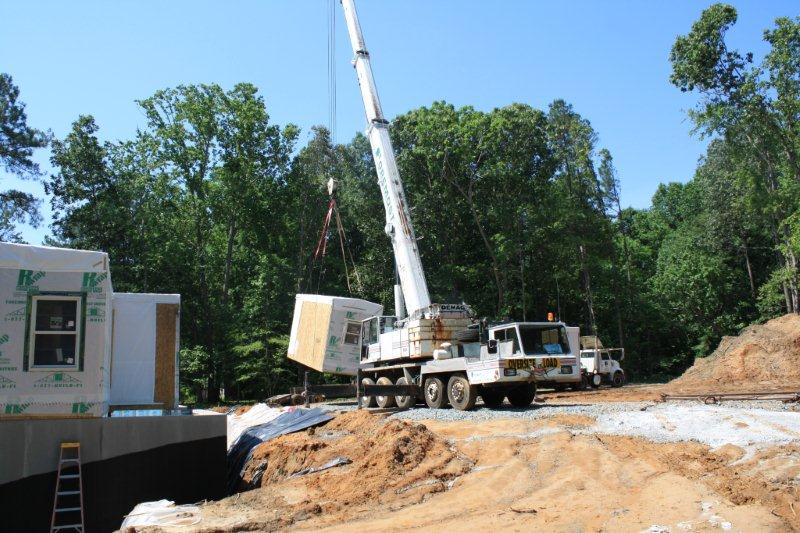
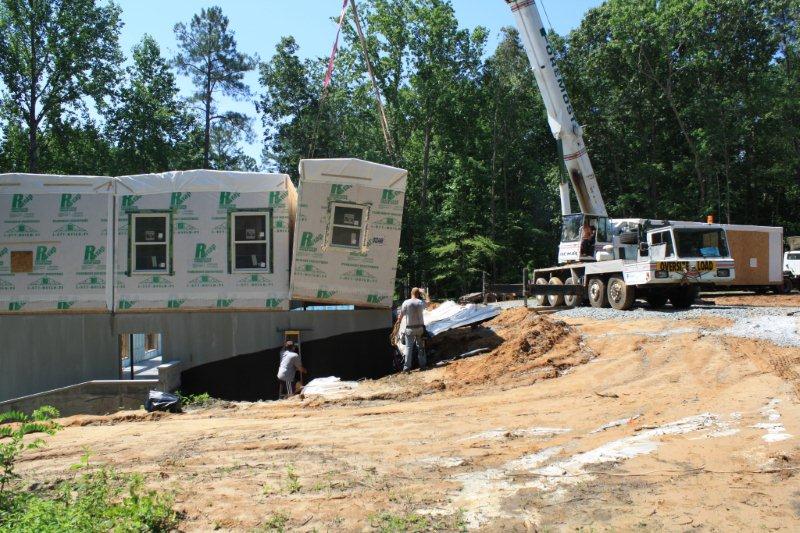
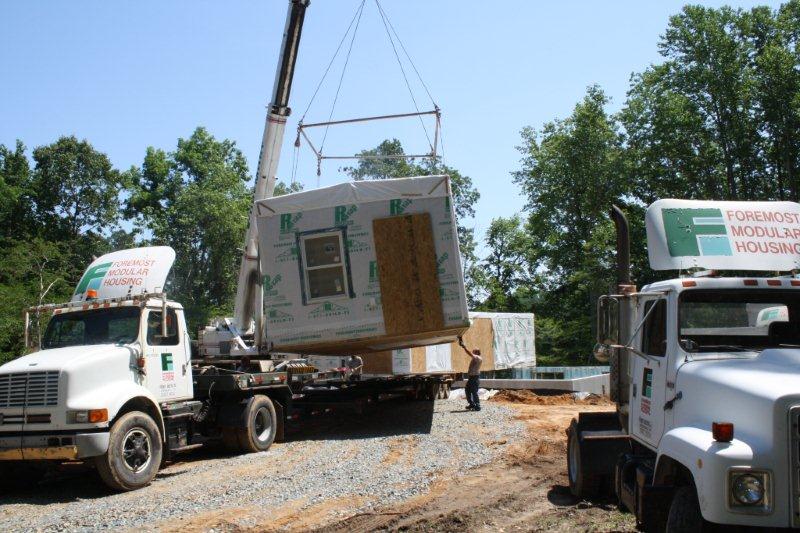
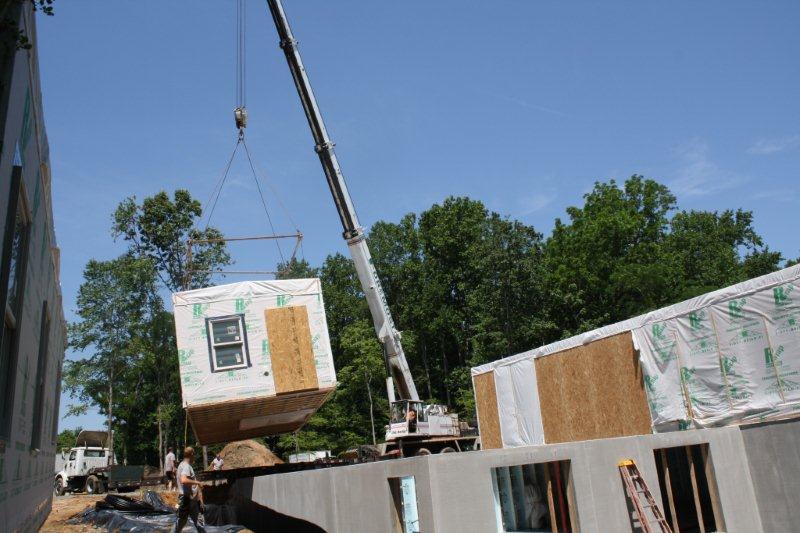
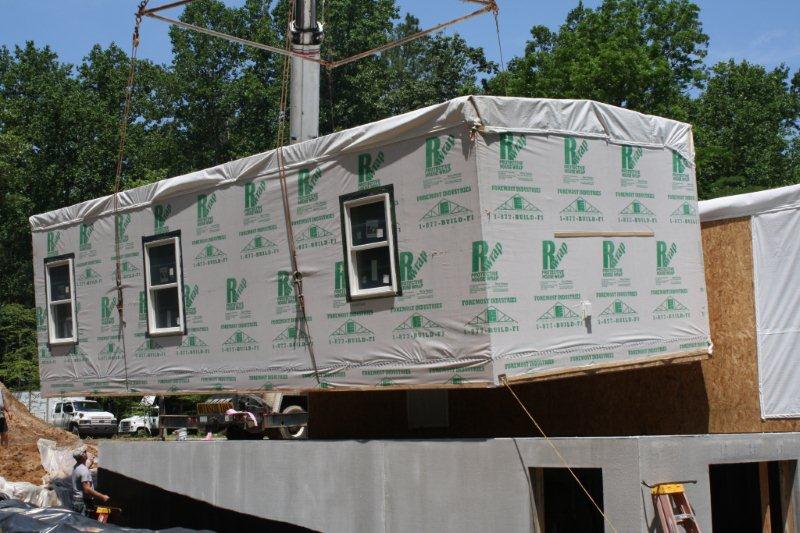
This is the Foyer/Kitchen/Sun Room Box - it is basically the center of the house
Bringing the crane over to hook-up
.
The modules have holes in the bottom to run the spreader cables through;
you can see the guy pulling the cable underneath in the back
.
Different view of the crane hooking up
.
Just about ready to pick it off the trailer
.
....
 .........
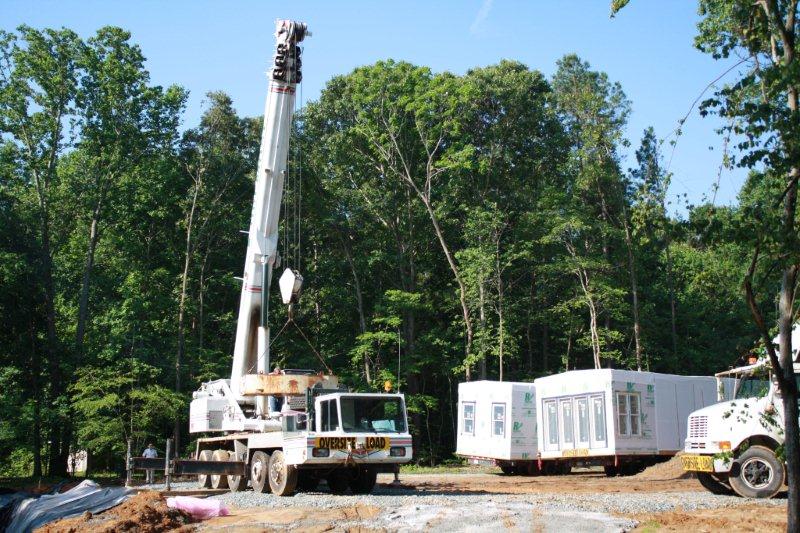
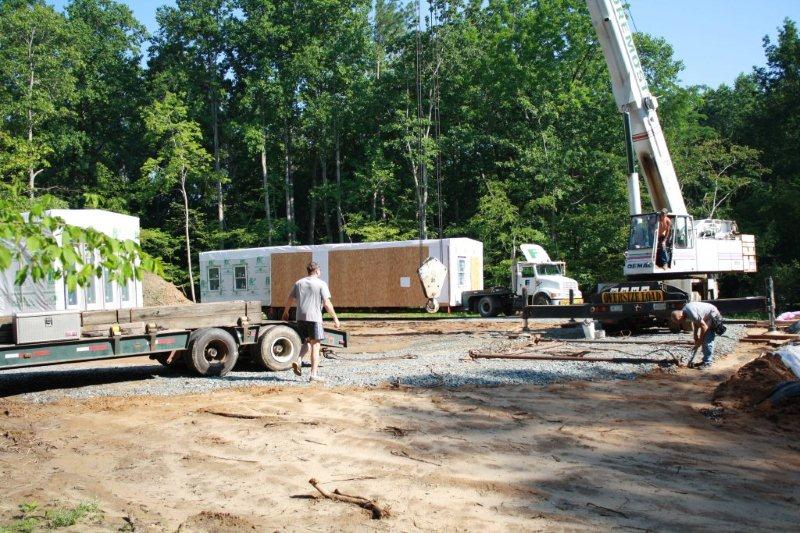
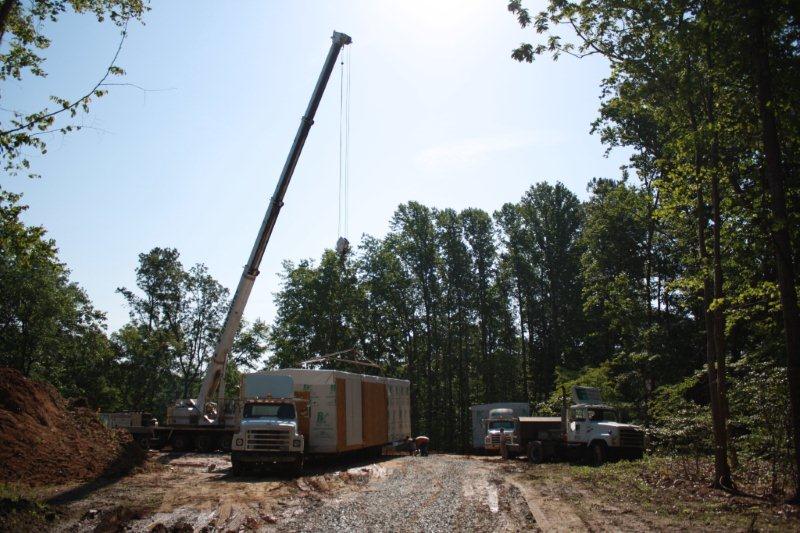
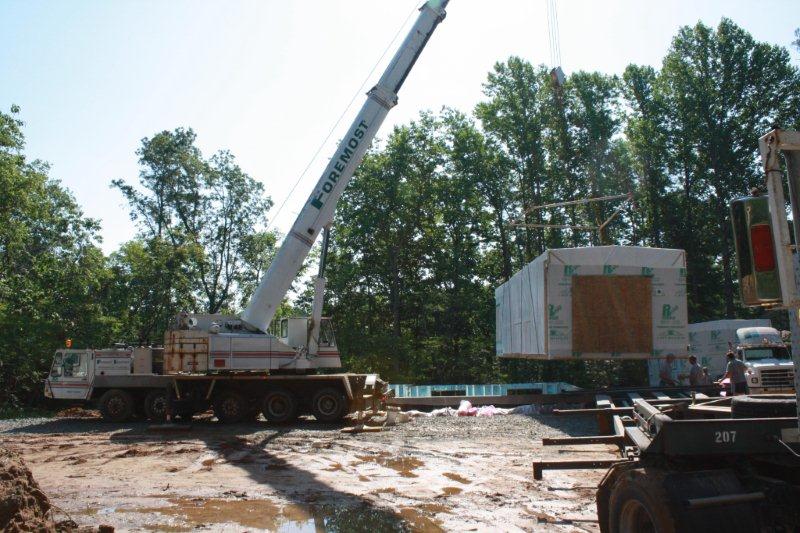
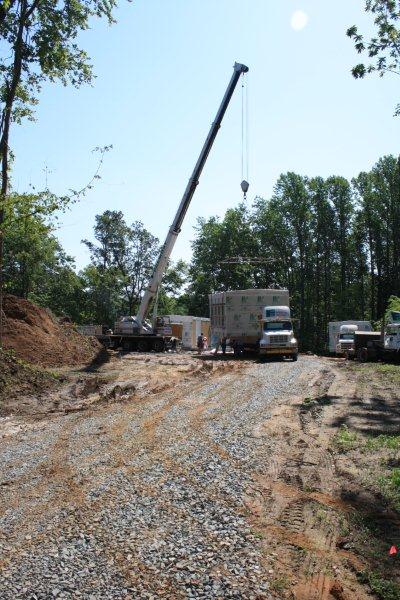
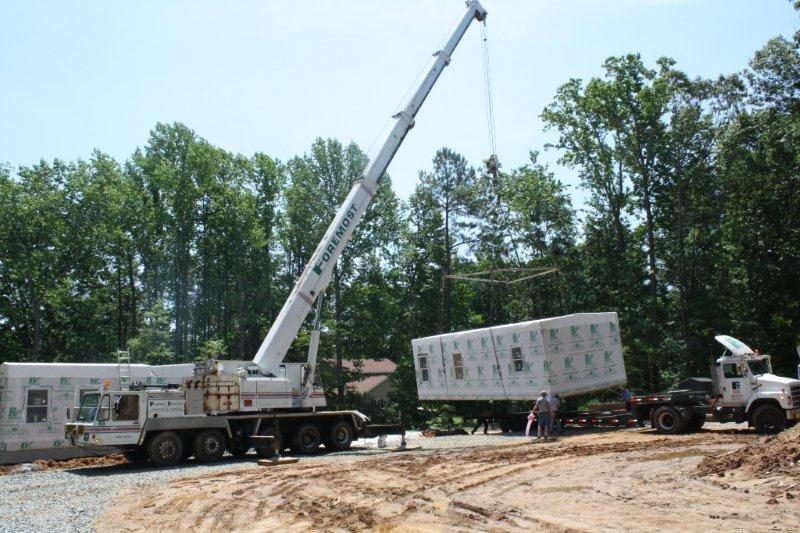
A couple of views from the front of the lot
.
Its up in the air - you can just see the guy in the back
stapling on the thin foam on the plate the rests on the foundation
.
Its on its way; the board in the front is covering up the front door
.
Another view
.
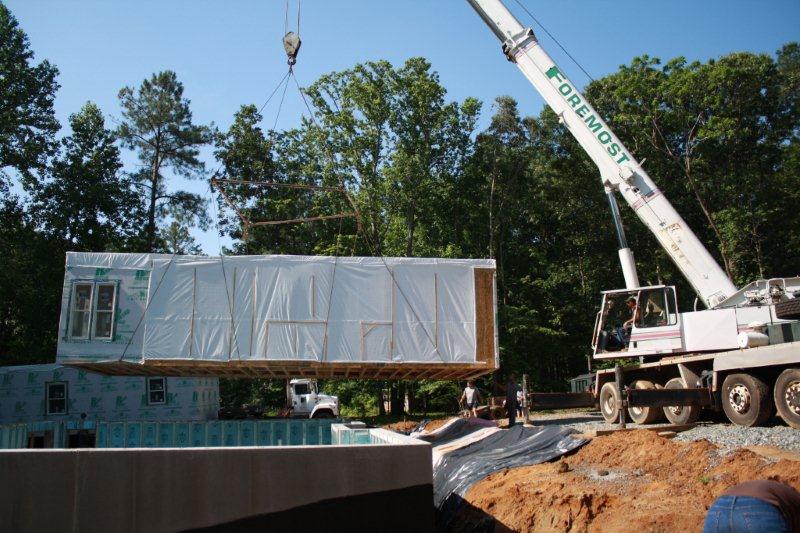
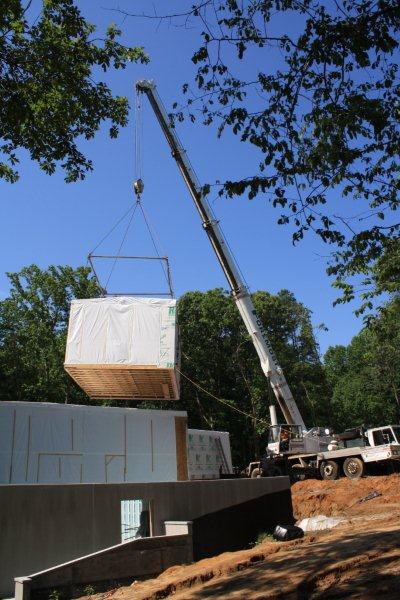
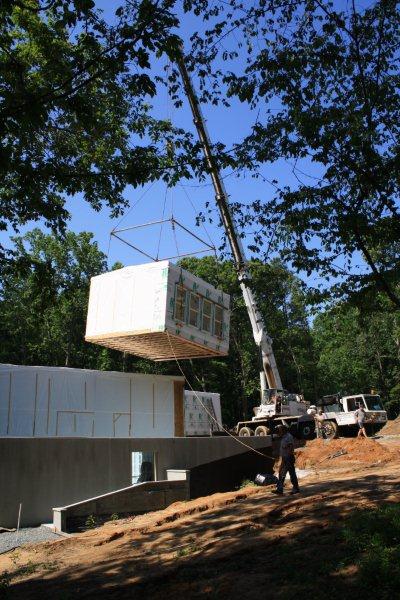
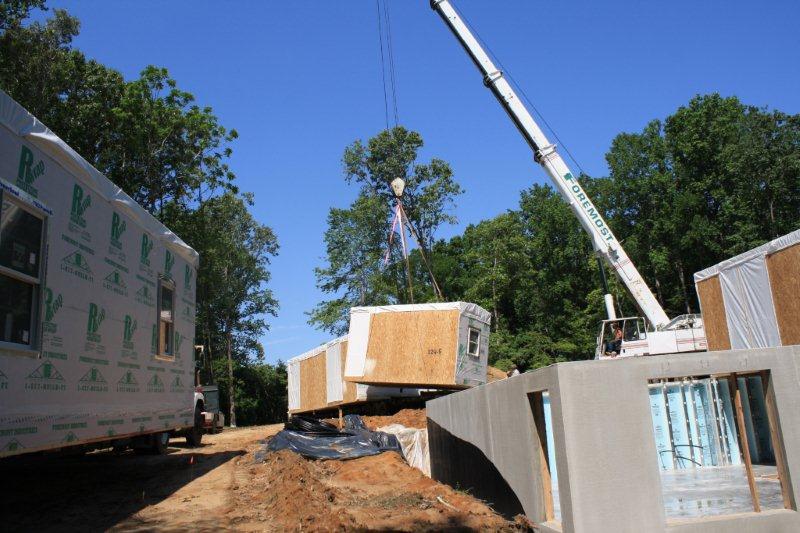
He's got it out over the foundation
.
...getting closer....
.
...just about there...
.
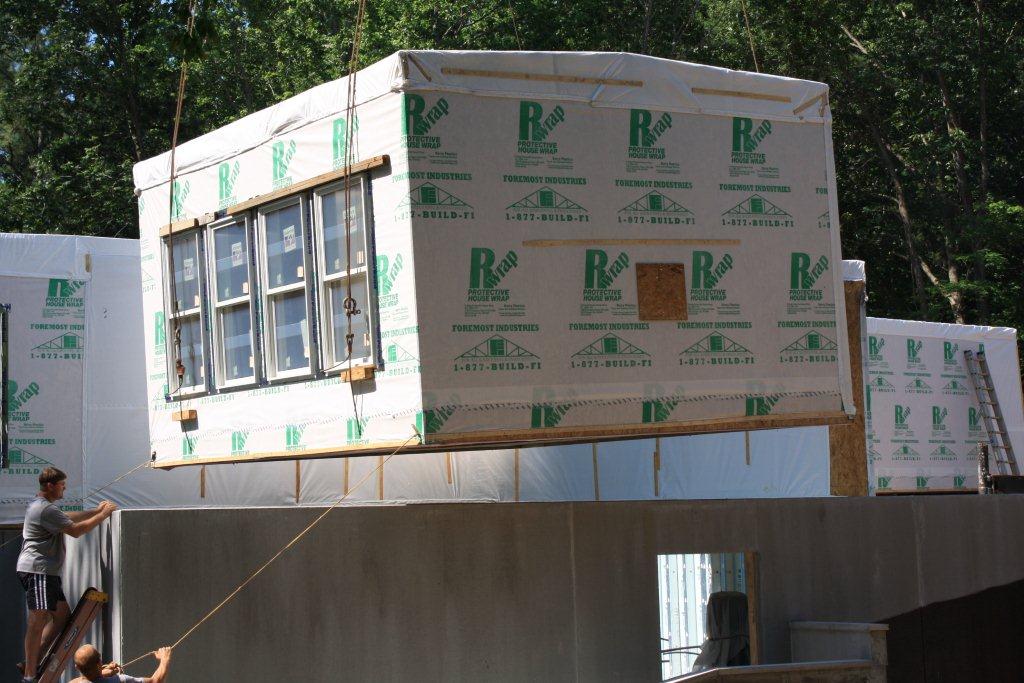
...close up of it being set...
.
... making sure its in the right place...
.
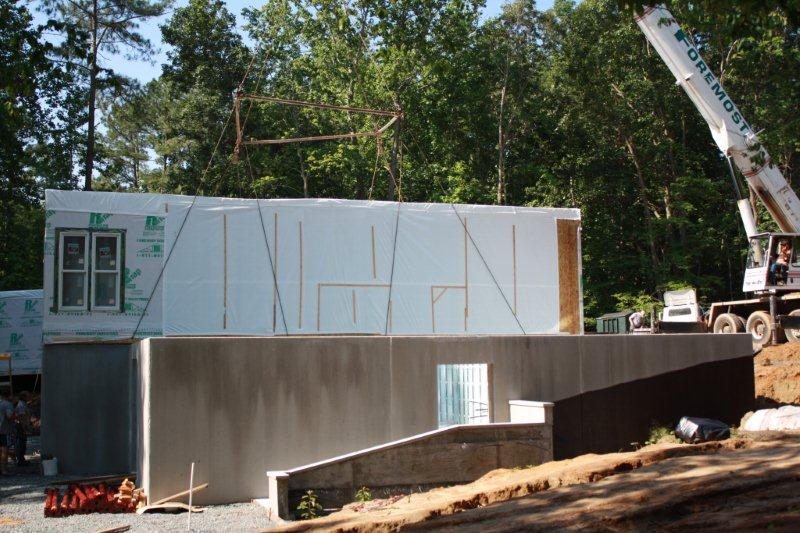
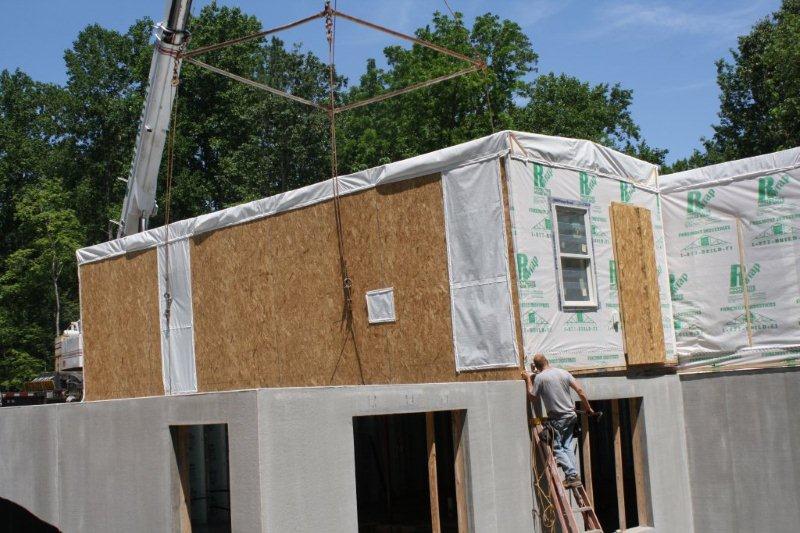
... its set -- but crane is still holding it until they get it "posted"
.
...checking alignment...
.
Close-up of the back - you can see where the cable goes
through the bottom of the box
.
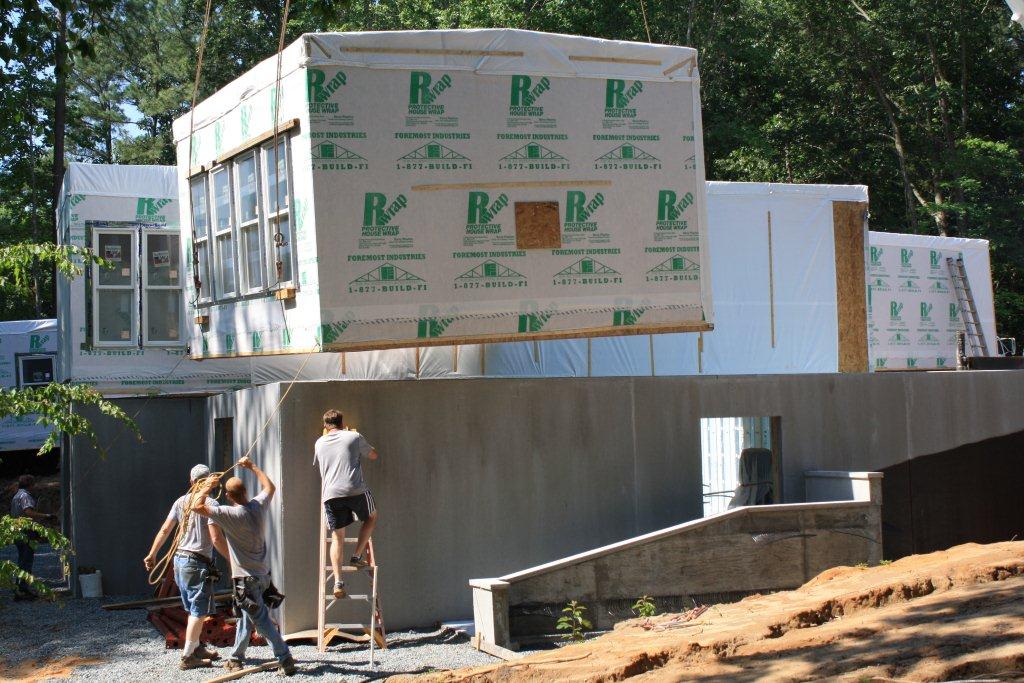
View from the bottom
.
Another view
.
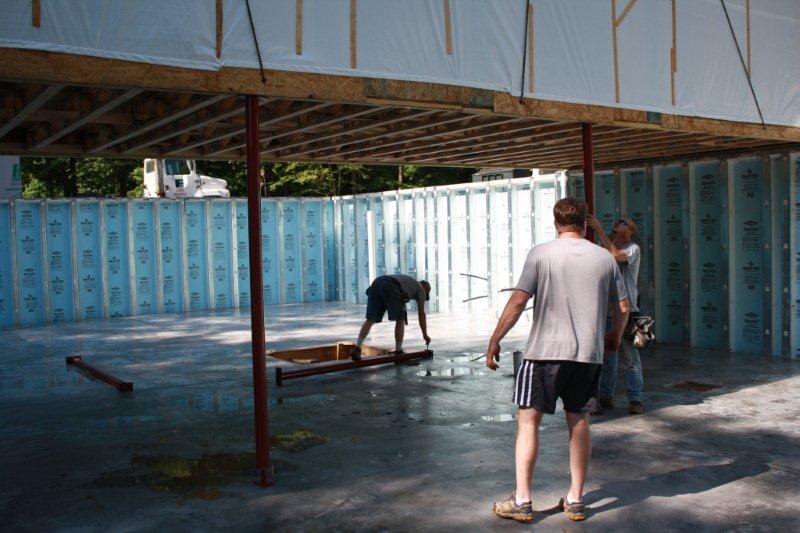
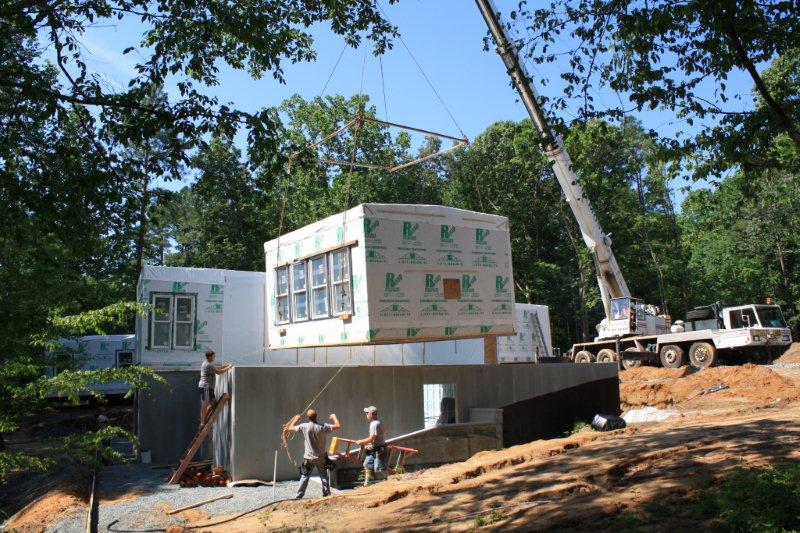
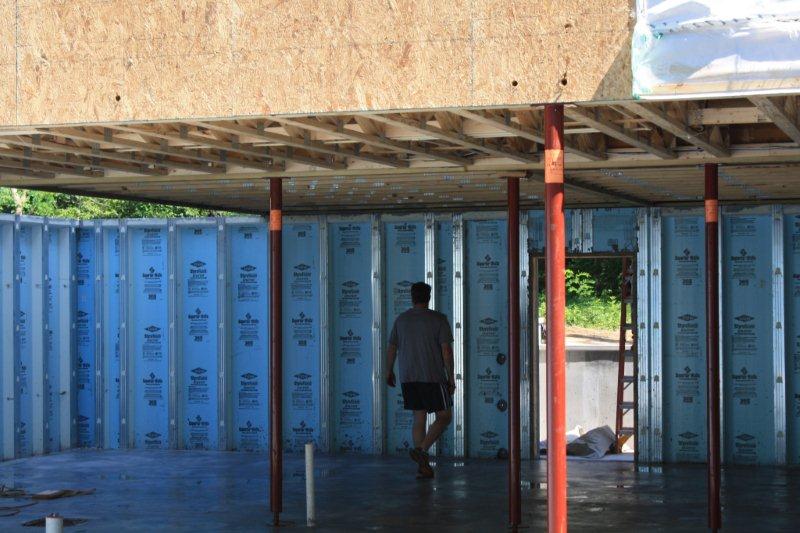
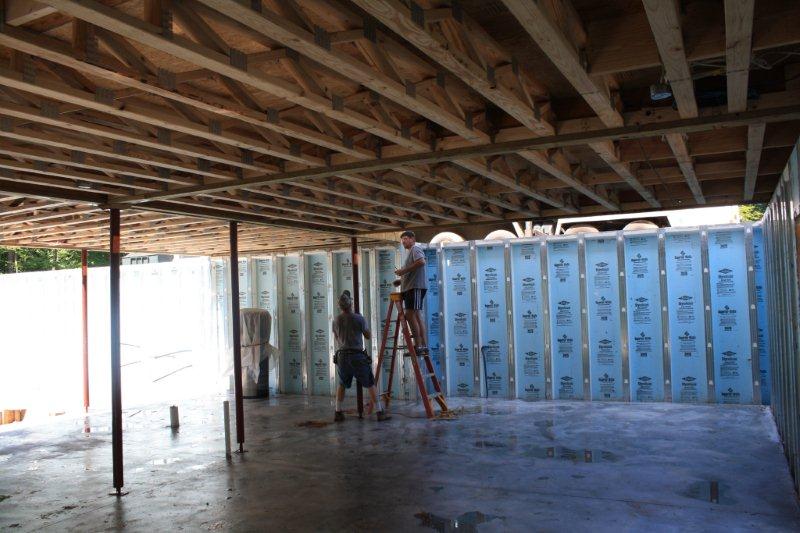
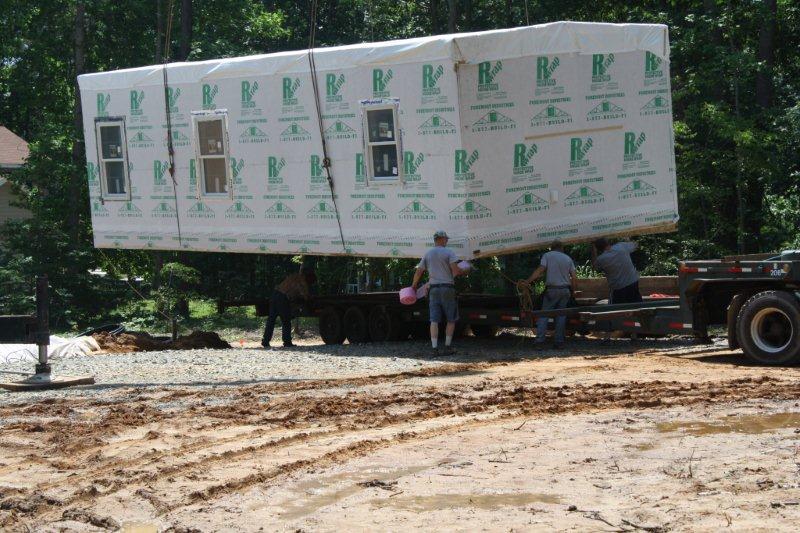
The guys are "posting" it - all the posts are temporary now -
when the come back on the 4th of June to bolt the modules down, the will set them
in their final position
.
...more "posting"...
.
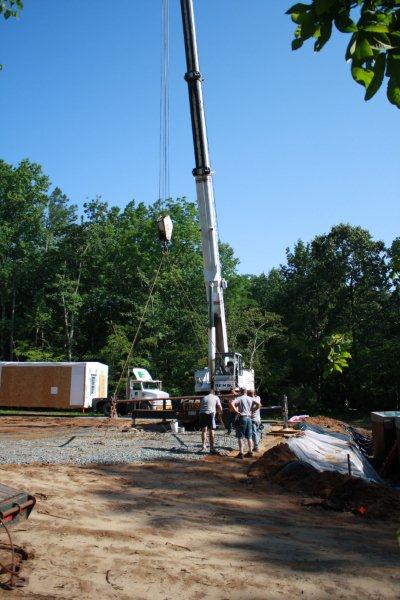
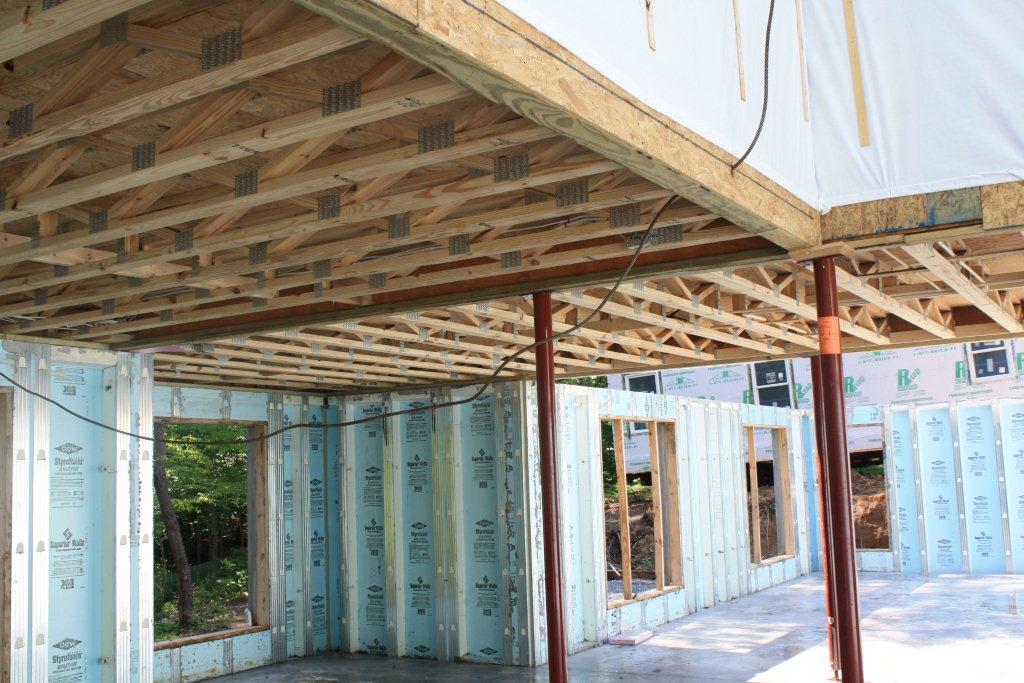
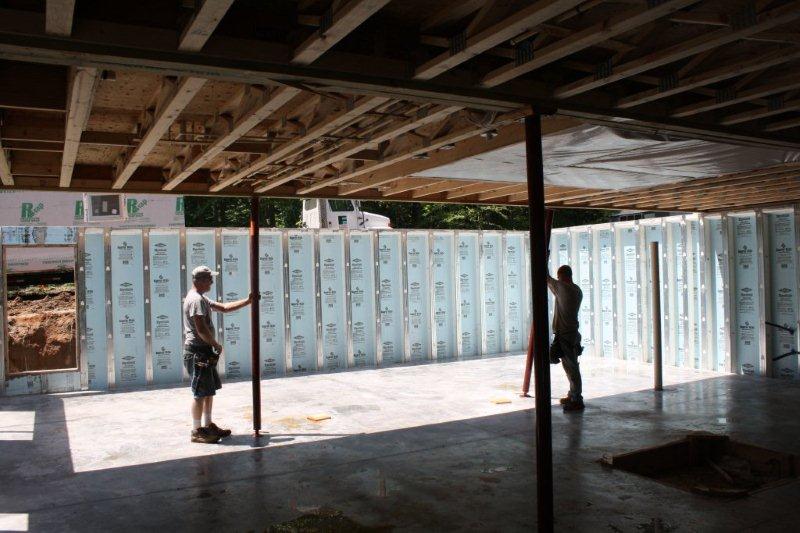
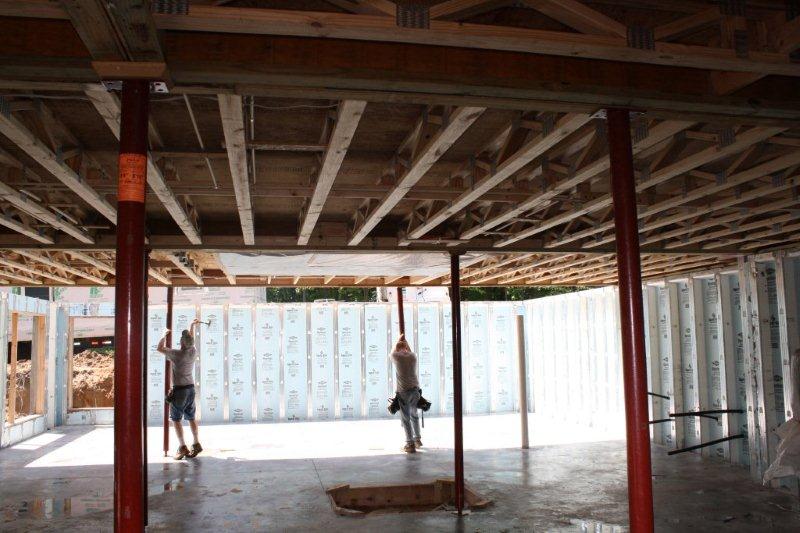
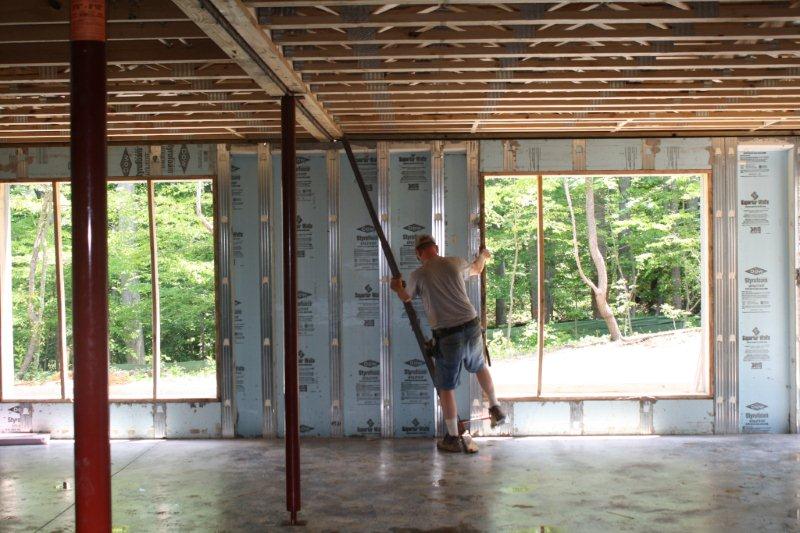
A view from the basement looking up at the crane
.
All done -- off to get another box.....
.
.
------------
Setting the Living Room Module-----------
.
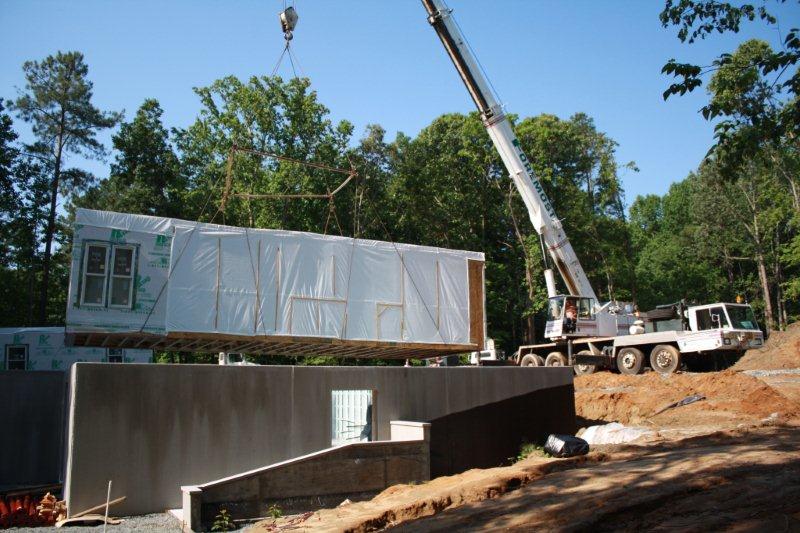
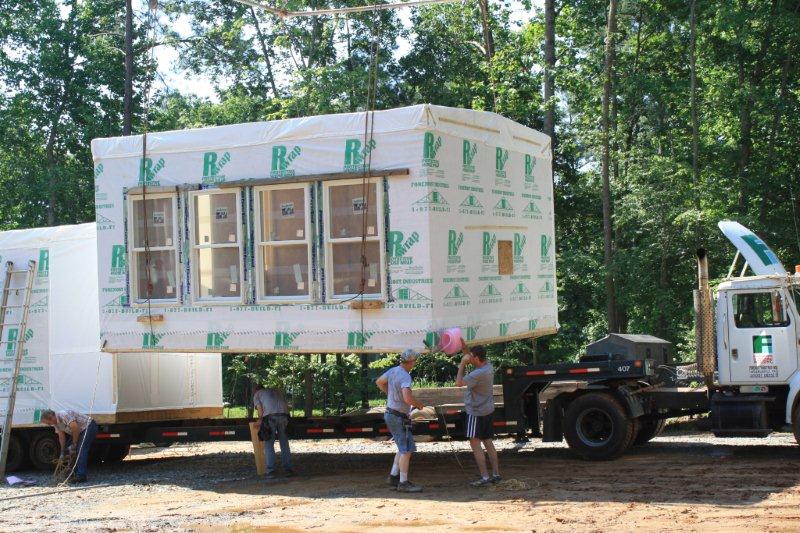
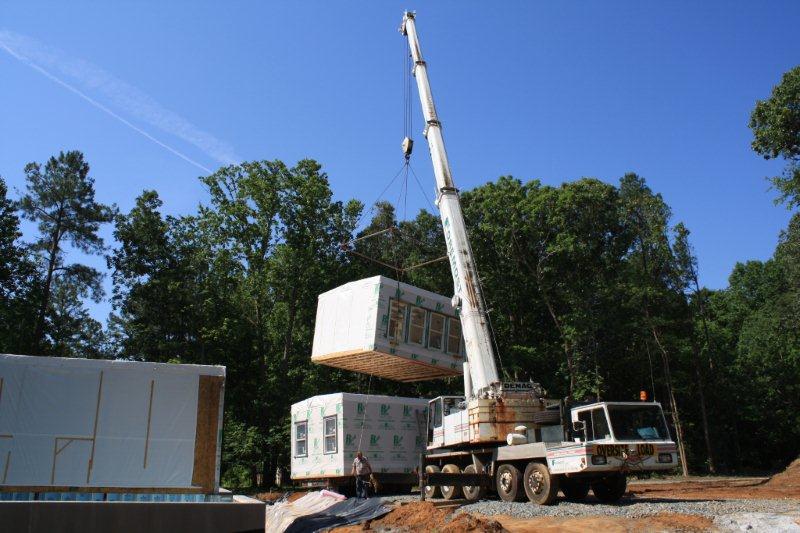
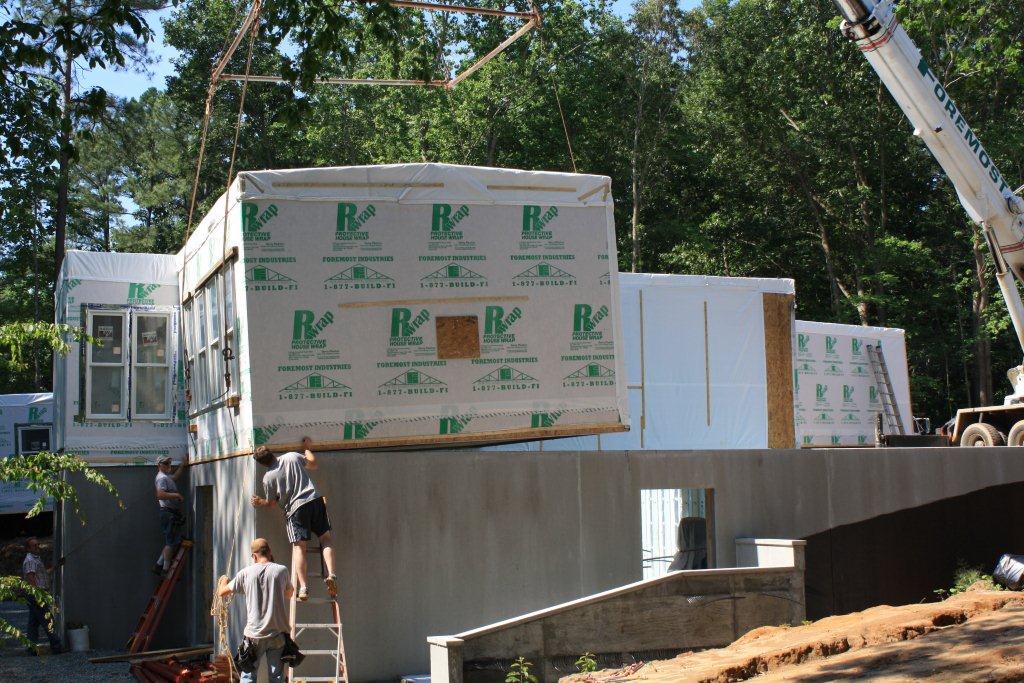
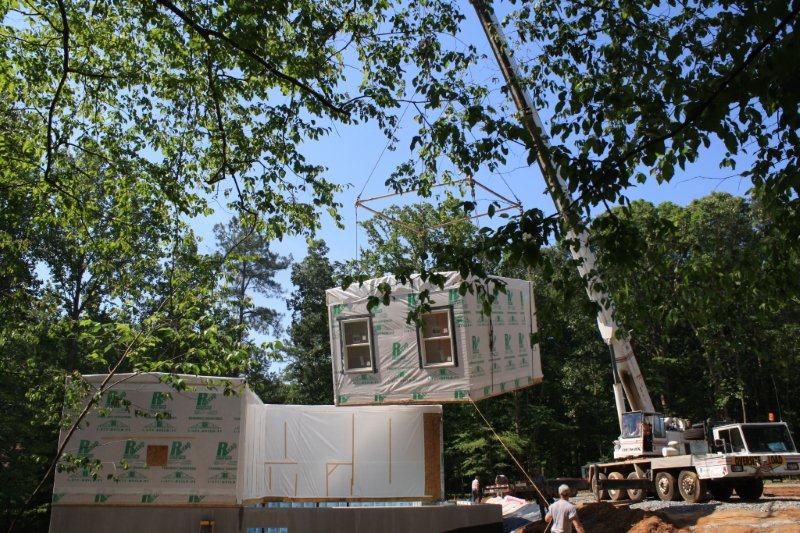
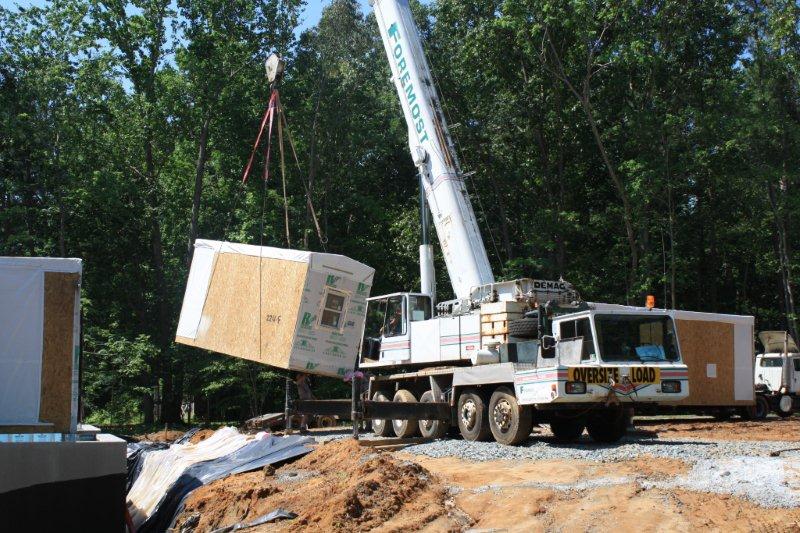
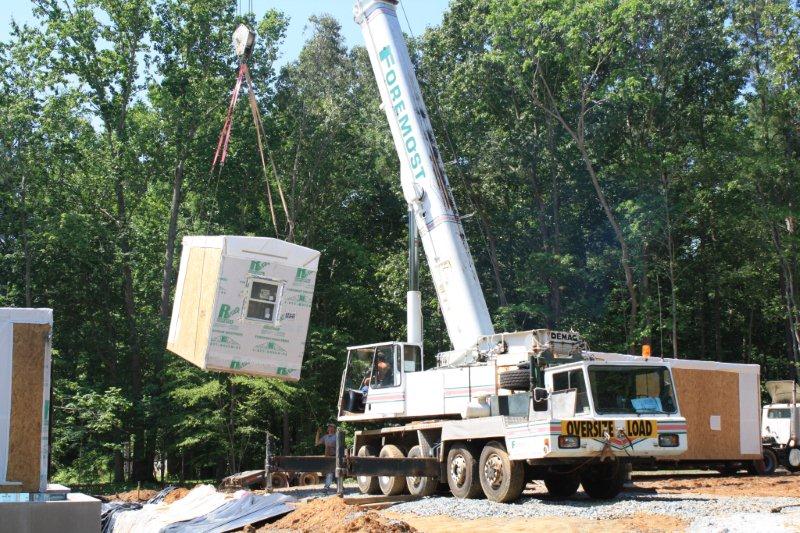
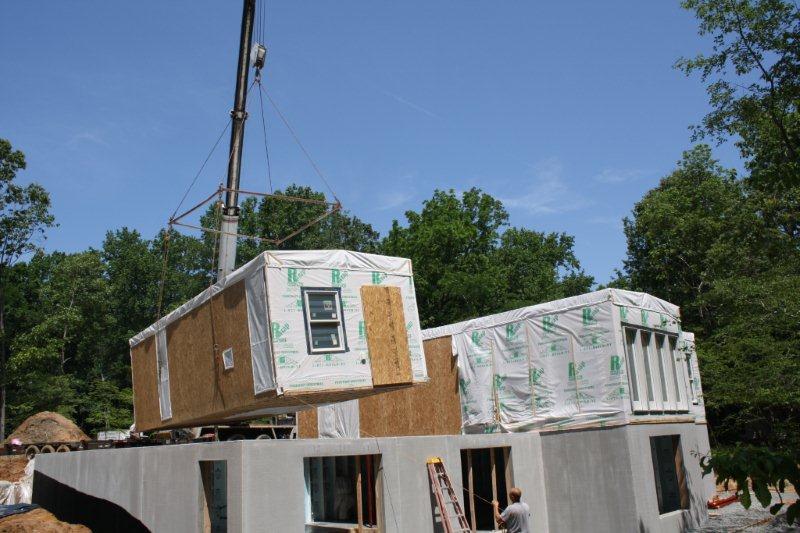
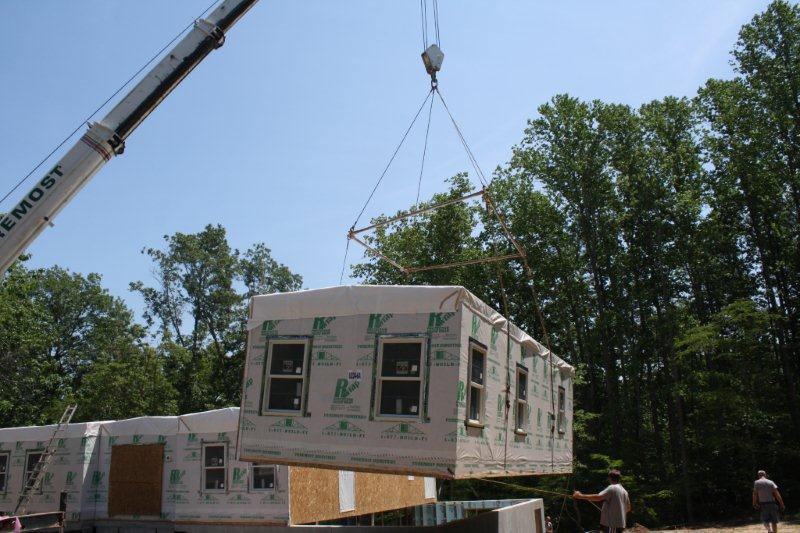
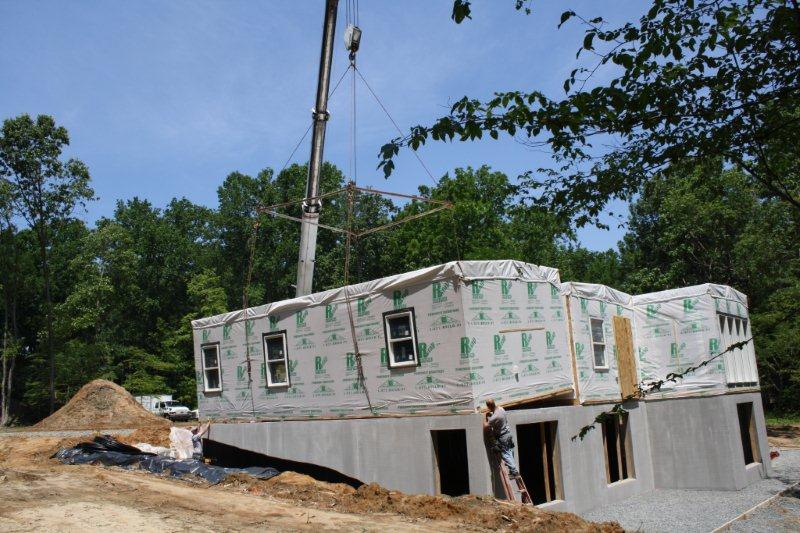
This is the Living Room/Great Room; this box will
be set on the back left of the house
The truck is backed into place with the Living Room and
Dining Room modules - the living Room is on the front of the truck
.
View from the front of the lot
.
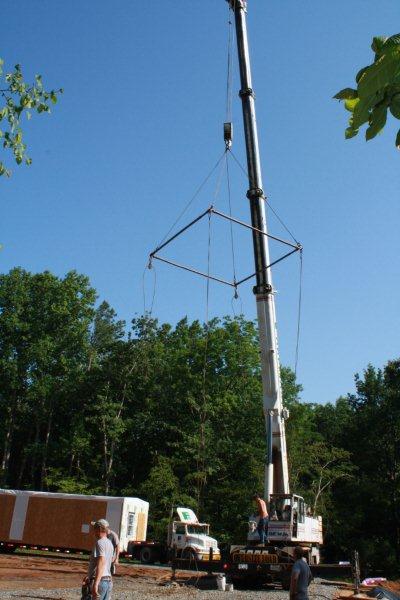
Lowering the spreader bar
.
Pulling the cables underneath and hooking them up
.
He's putting a board above the window so the
cable does not rub up against the windows
.
Starting the "pick"
.
View from the front
.
....
 .........

A couple of views from the front as they are
just starting to pick the box up
.
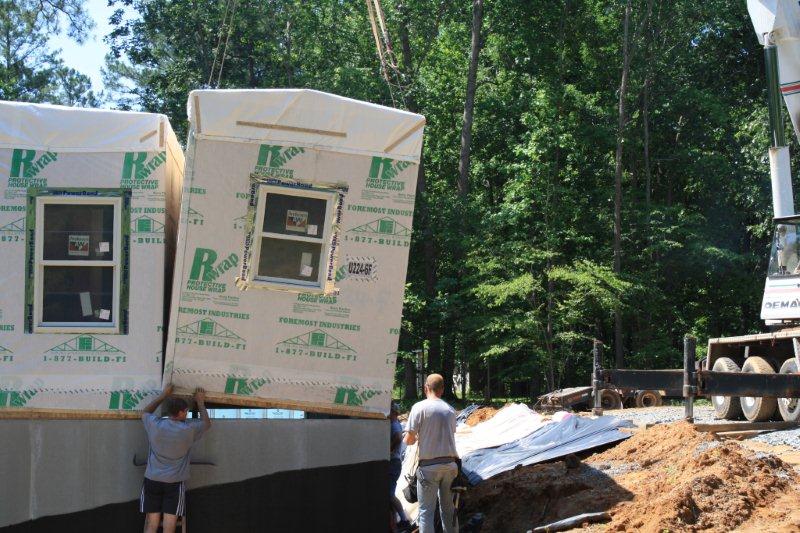
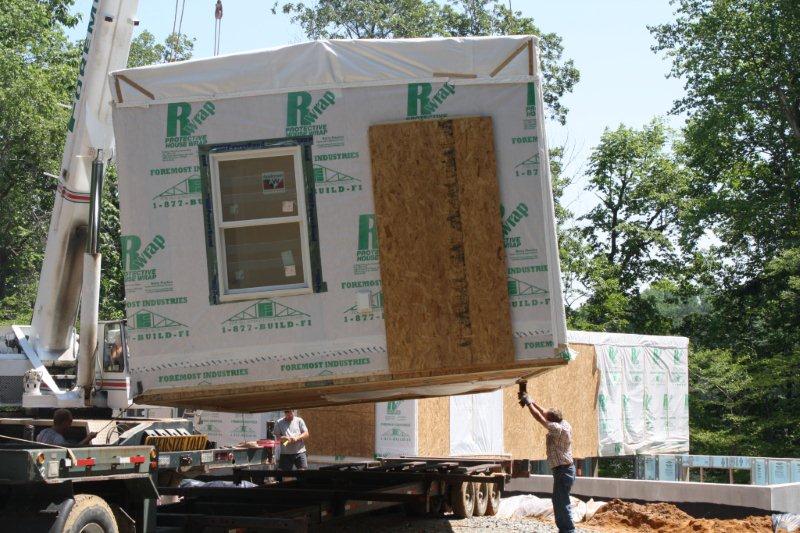
Putting the insulation on
.
Its on the way
.
He's got to pick this up pretty high to get over the kitchen
.
Starting to swing it over the house
.
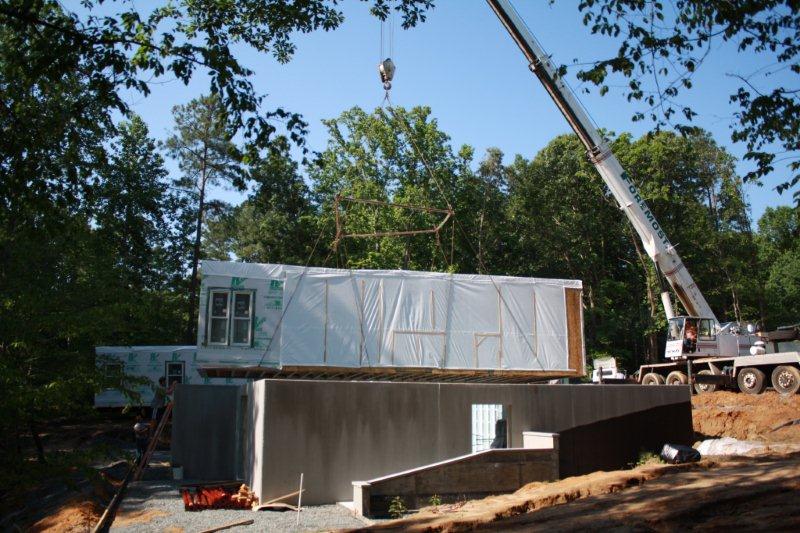
Over top of the kitchen as it heads to the back corner
.
This would be a bad time to "drop it"
.
....
 .........
A couple of views as it goes up and over the kitchen
.
Just about "cleared" the kitchen
.
Passed the kitchen and the got the box oriented
correctly (with the windows in the back of the house)
.
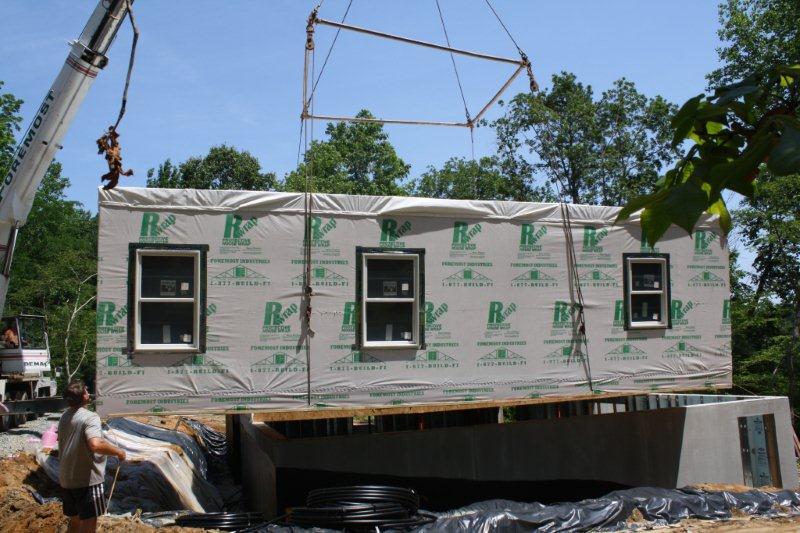
Starting to lower it
.
Close up as the guide it in -- the small piece
of wood on the side of the house is the vent for the gas fireplace
.
Still guiding it in
.
Another picture as the get ready to set the box
.
Getting the final alignment
.
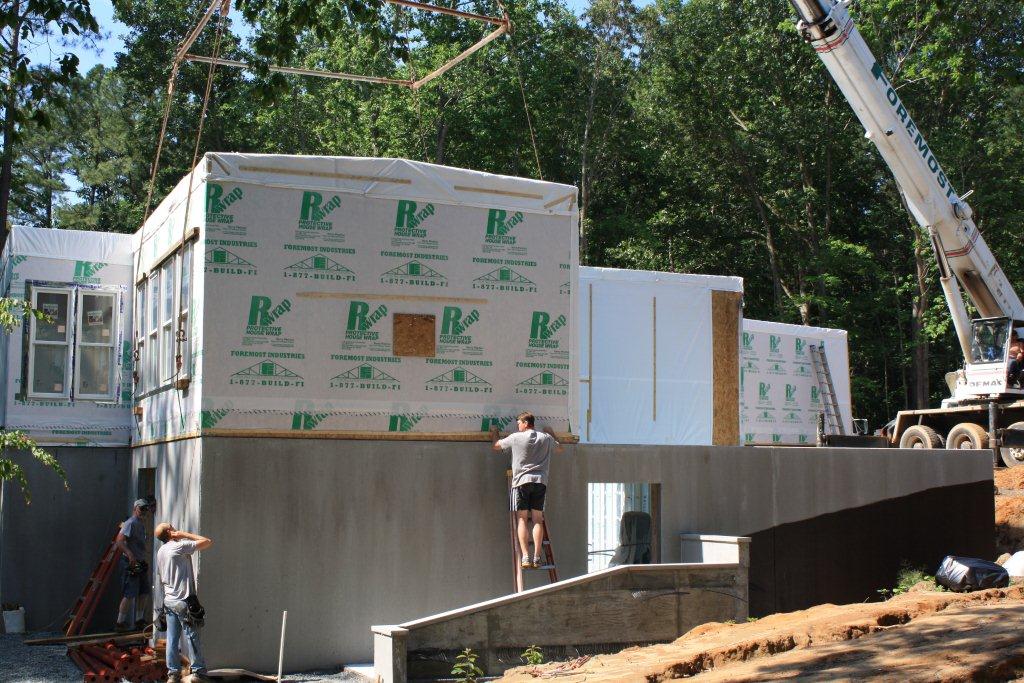
It set!!!
.
A little tweaking while the crane is still holding the weight
.
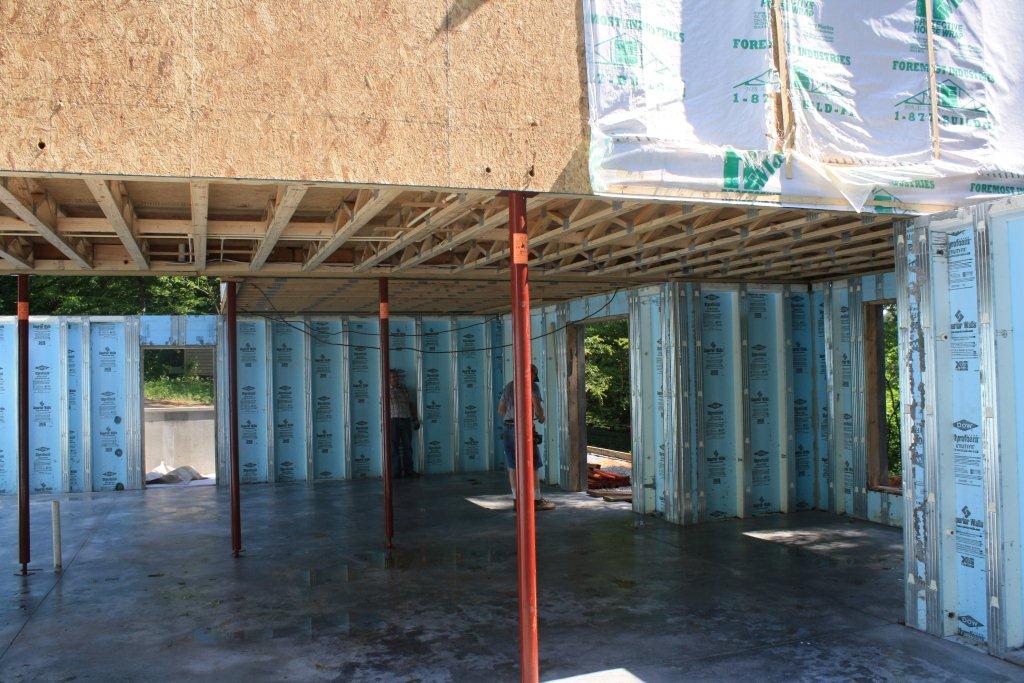
View from the basement
.
Another basement view - you can see the cable
has been released and they just need to pull it out
.
You can really see the cable "hanging" in this view
.
View from the other side of the basement
.
....
 .........
Off to get the next box.....
.
.
------------
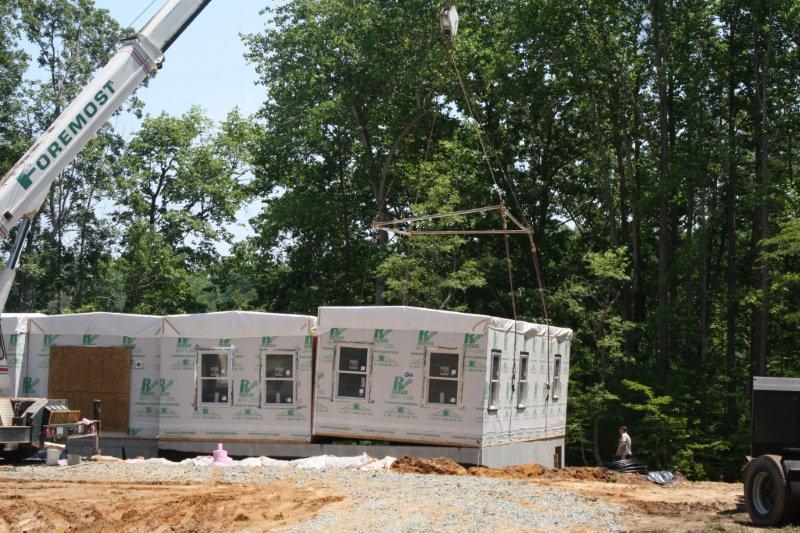
Setting the Dining Room Module-----------
.
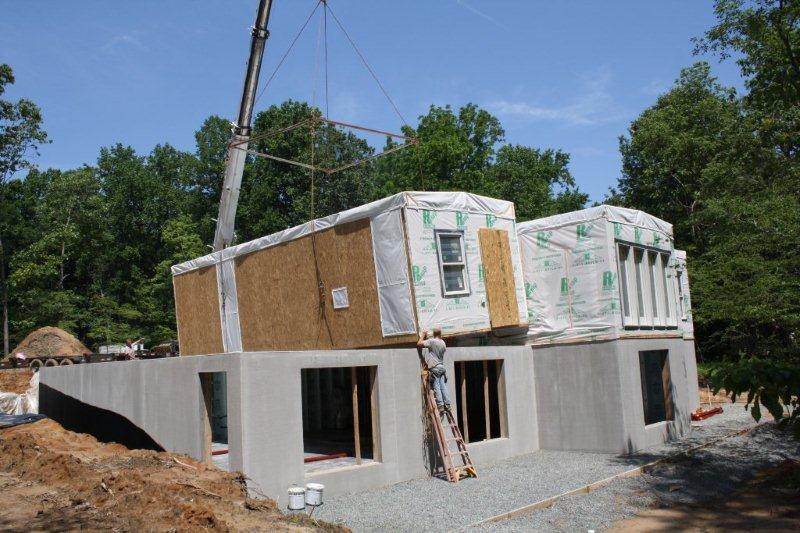
This is the Dining Room; this box will
be set on the middle left of the house (next to the Living Room/Great Room)
Lining up the spreader bar over the Dining Room
.
View from the front of the lot
.
Cables all hooked up
.
....
 .........
A couple of views as they start to pick up the box
.
Putting on the insulation - also not the most "level pick"
.
Starting the "pick"
.
Starting on the way
.
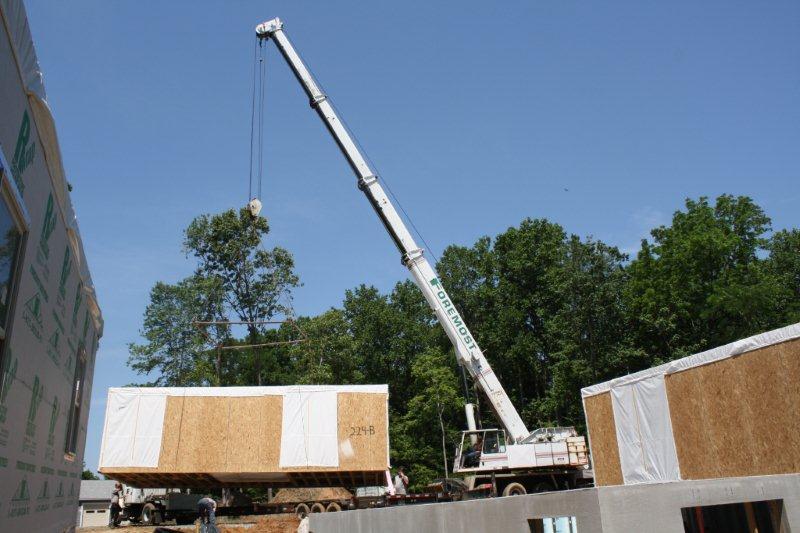
Up and over the kitchen
.
View of the box has it is moving over the kitchen
.
Going over the top
.
Just about cleared the kitchen
.

Guiding it in
.

Close up as it is lowered
.
Just about set
.
Close up of the final lowering
.
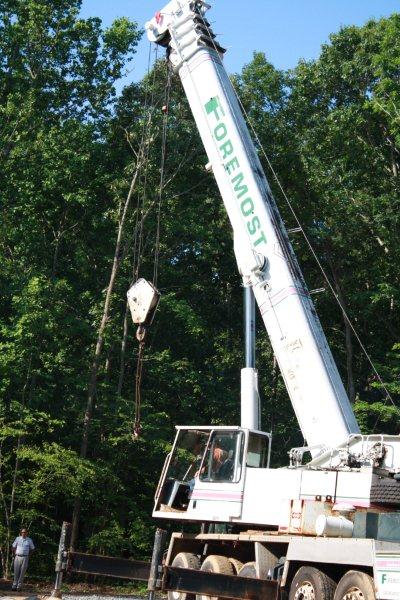
--Ivan at the controls--
.
Almost done with the set
.
Final adjustments
.
Checking alignment
.
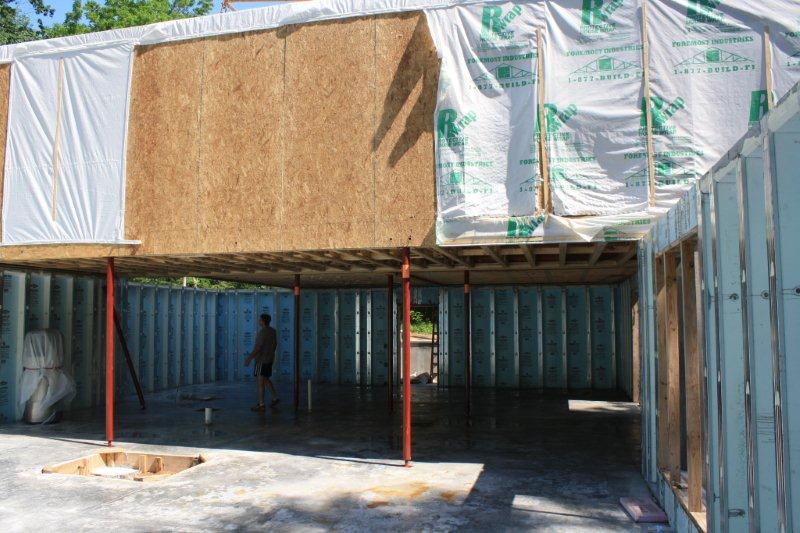
View from the right back corner of the basement -
looking toward the front corner
.
Just moved toward the middle of the basement - picture
still taken from the right side
.
Standing by the back door (under the Living Room) looking
forward - You can just see the wheels of the crain over the basement wall
.
From the outside looking into the basement
.
Another outside looking in view
.
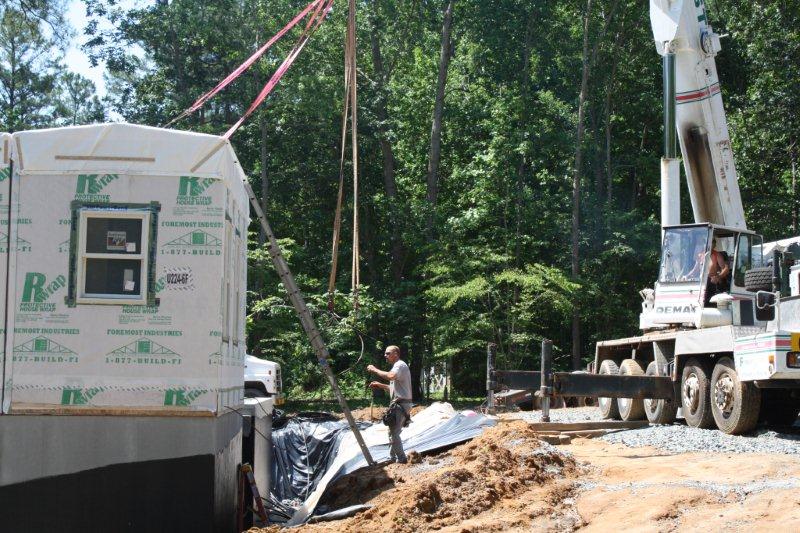
Cables unhooked and starting to pull the bar off
.
Empty trailer getting out of the way - to get ready for the next box
.
.
------------
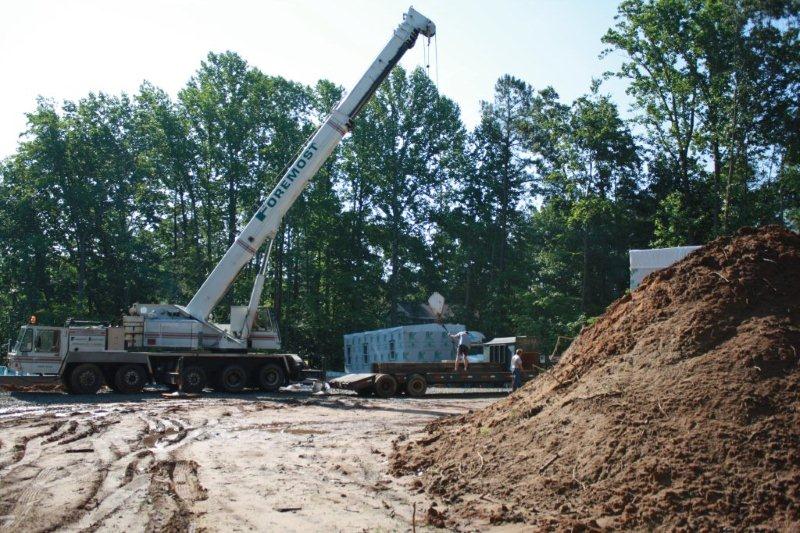
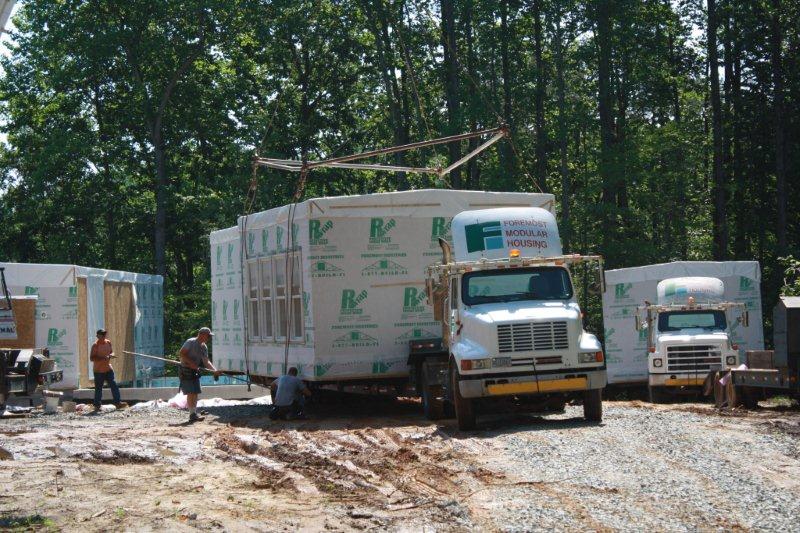
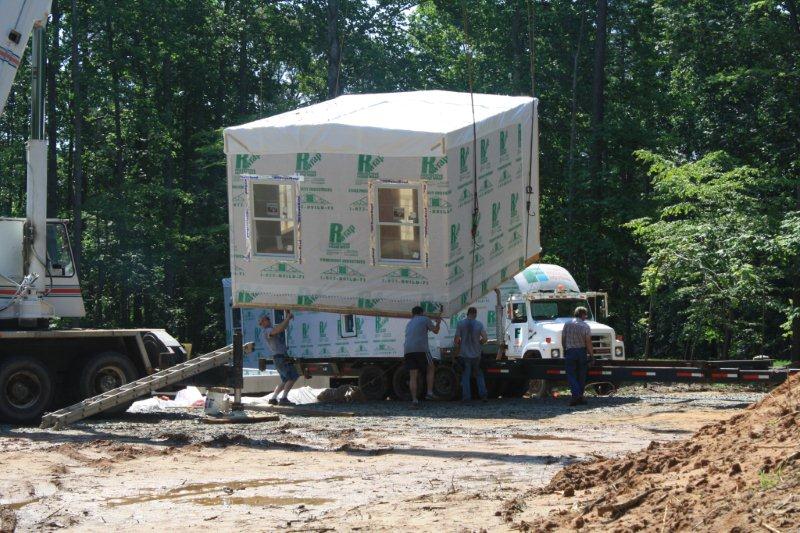
Setting the Mud Room (WIC) Module-----------
.
This is the smallest box - it is a little mud room/
Walk in closet off of the foyer
The truck driver is moving the truck into place - he
went flying through the front yard so he wouldn't get stuck in the mud. The
Mud Room module is on the back of the truck and the Office/stairs/etc module is
on the front of the truck.
.
The truck is in place for the "pick" - the two windows
on the module are on the front of the truck
.
Ready to pick - the box was so small, they had to take
the spreader bar off and use straps.
.
Starting to pick it up - this picture was taken from the
back right side of the house - on the right, you can see the kitchen module sitting
on the house and to the left you can see the Master Bedroom still sitting on the
truck
.
Picture from the other side of the house - you can see
the empty spot where the box will go
.
Another view
.
It's starting on the way
.
Headed up to get over the kitchen
.
Over top of the kitchen
.
It's getting set in place
.
Close-up of the set
.
It's set
.
He has the bar angled so he can put a jack in there
and push this module next to the other
.
All done
.
.
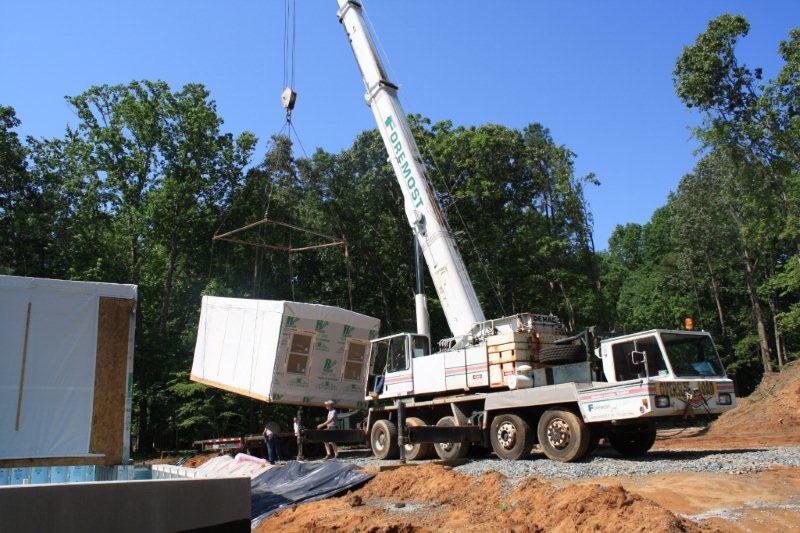
-----------Setting the Office/Stairs/Elevator/Laundry Room -----------
.
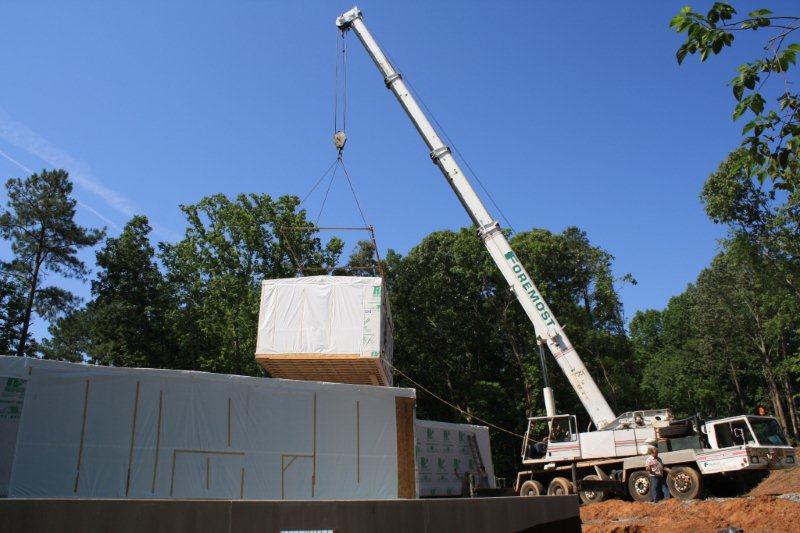
This box is basically the connection between the kitchen foyer and master bedroom/bath - It
has an office in the front - a front hallway to the master bedroom - elevator and stairs - a back hallway to the
master bath- off the back hallway is the Laundry room- next the laundry room is the pantry (with entry from the
kitched)
....
 .........
A couple of views as they are bringing the spreader bar in
.
Starting to pick up the box
.
I think they are installing the insulation
.
Close up
.
Getting ready to move it over - you can see the plastic
covering the front and back hallways
.
Getting it turned around - the board is covering the
door to the deck
.
It's heading back
.
Just about there
.

Guiding it in with the guide rope
.

Close-up
.
Getting it lined up
.
Close up of him lining it up
.
Setting the poles
.
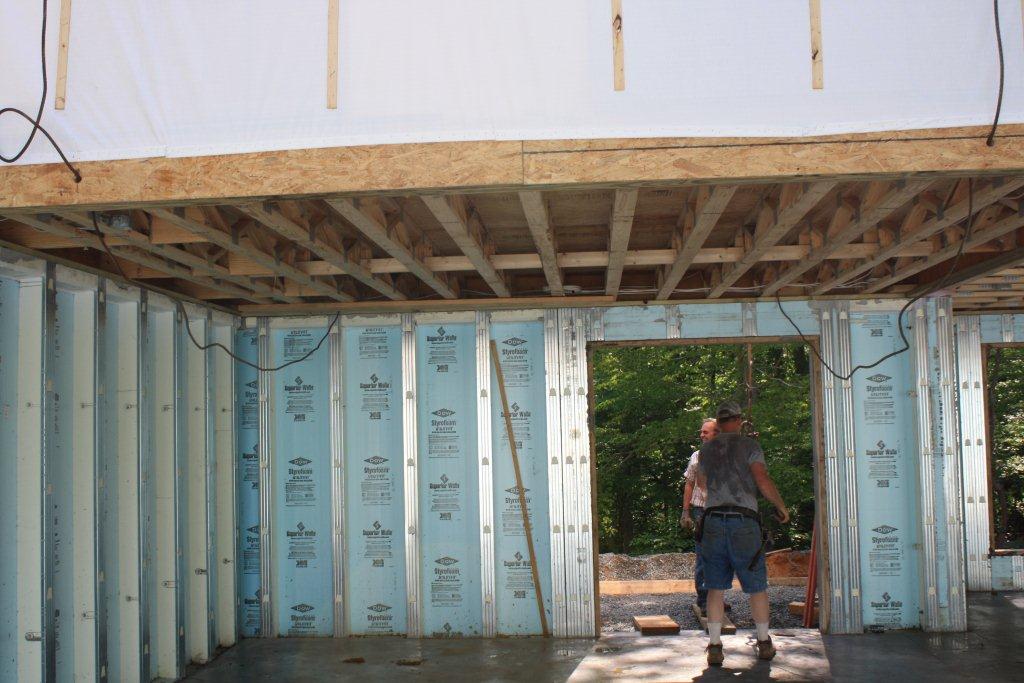
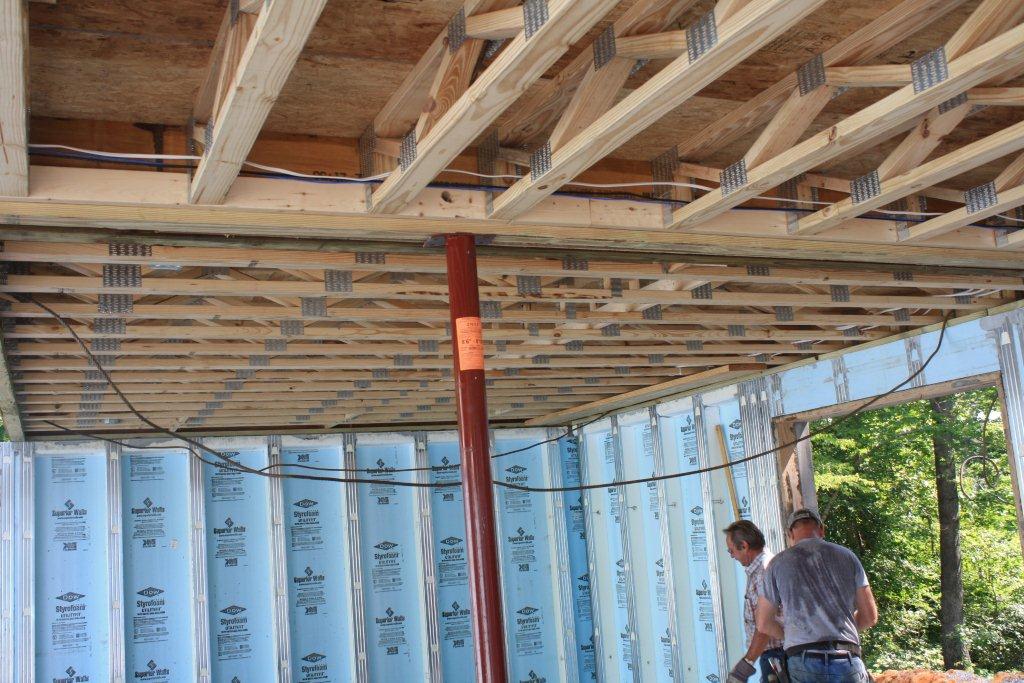
Another basement view
.
Looking at it from the back of the house
.
All set and pulling the cables out
.
Five down --- one to go
.
.
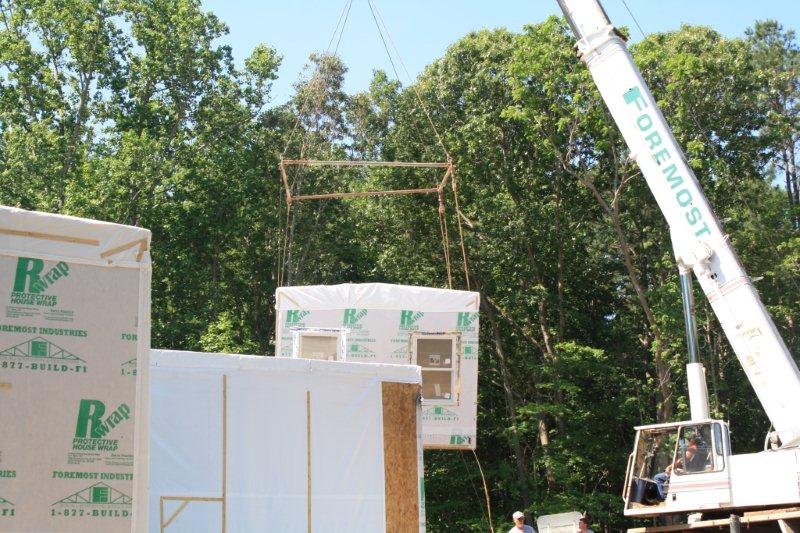
-----------Setting the Master Bedroom/Master Bath Module -----------
.
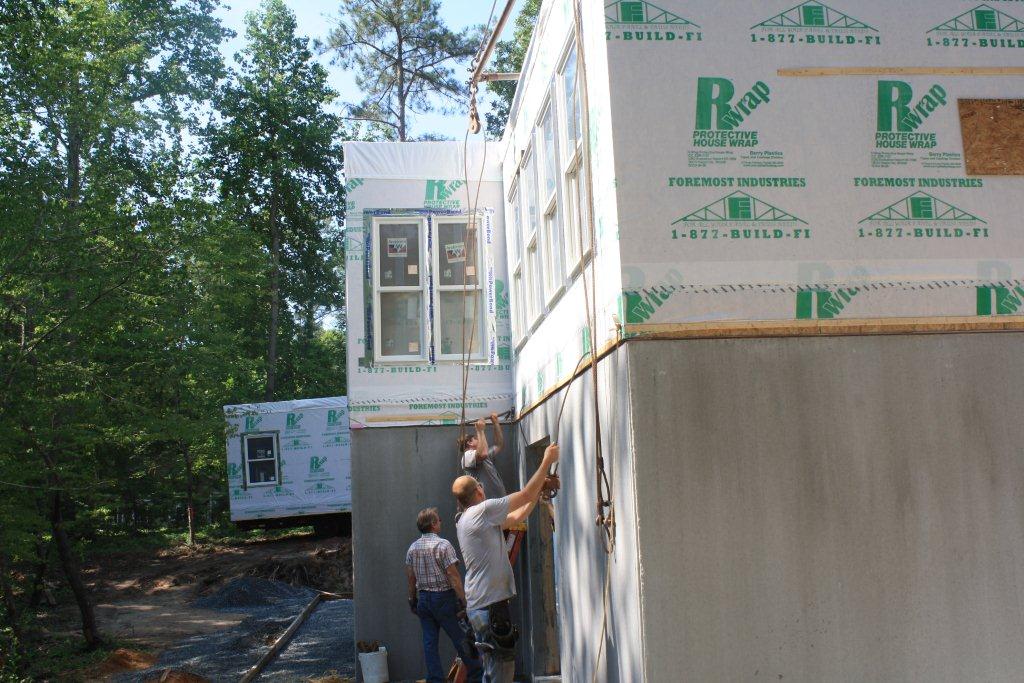
This was the first box built and ironically the last box to be set. The Master Bedroom
is on the front of the house, as small hallway with closets on both sides and then the Master Bath on the
back of the house
.
Pulling the truck up from down the hill.
.
....
 .........
Trucks in place and they are lowering the spreader bar.
.
Hooking up the spreader bar
.
Starting to lift the box.
.
Installing the insulation
.
On its way ; you can see the plastic covering the front hallway opening (right
hand side) and the back hallway (on the left side). The small opening with plastic is the laundry
chute from the Master Bath to the Laundry Room
.
Another view of it just off of the truck
.

Its up over the house
.
A little bit of a close-up as they guide it in
.
View from the side
.

View from the back as they set it down
.
Close-up from the back
.
Just about there
.
View from the front - they had a rough time getting this one just right
.
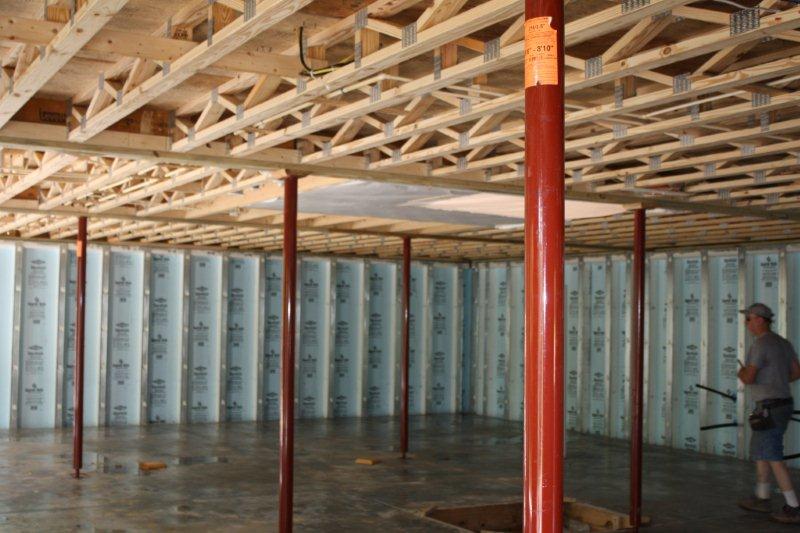
View from the bottom
.
This was part of the final adjustments getting this one set
.
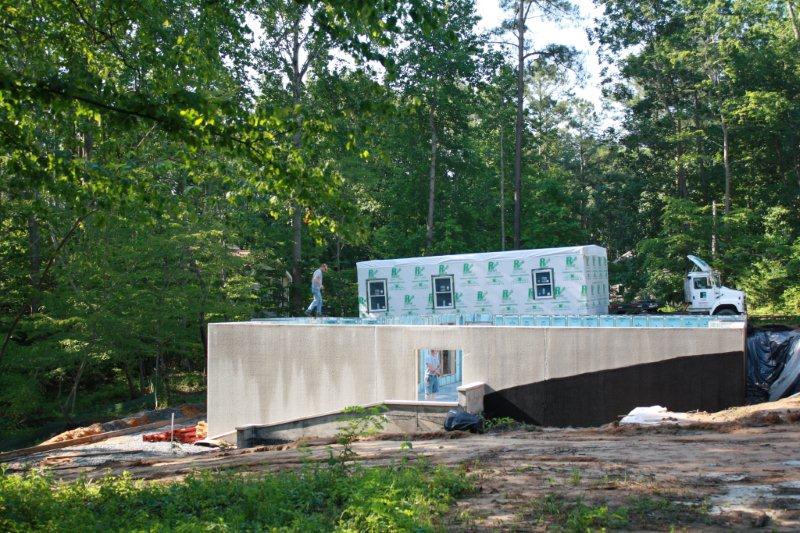
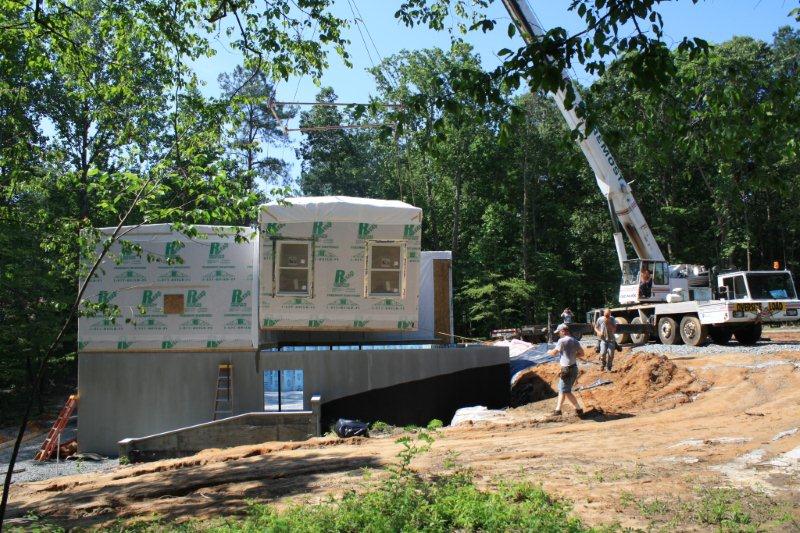
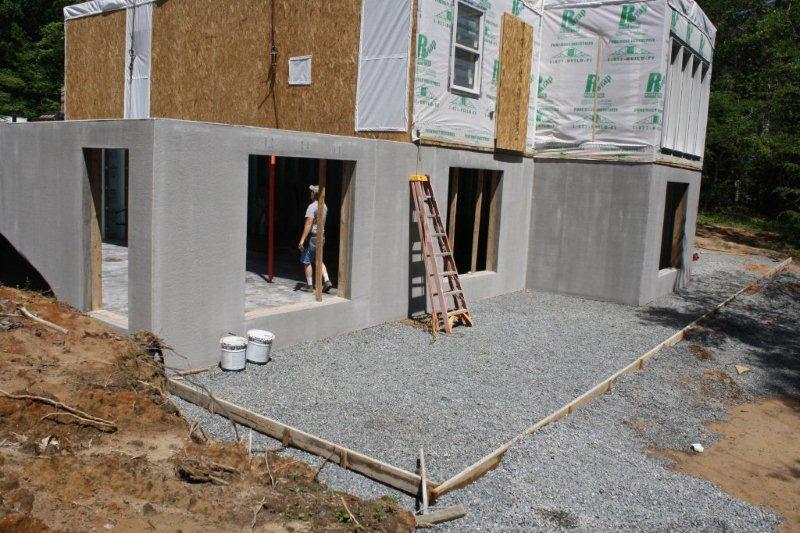
So now we have all six modules in place. But... since they are not
coming back until Monday and it is supposed to rain, they left everything all sealed up. We
could not get in and look and with the little mini roof on the top of each module, it looked
like we had a "trailer park sitting on top of our basement.
.
----------------------------------------
.
But..... Being shut out doesn't always stop Mindy; she found an open seam
in the kitchen module (where the sun rooms sticks out. I went and got a ladder and....
.
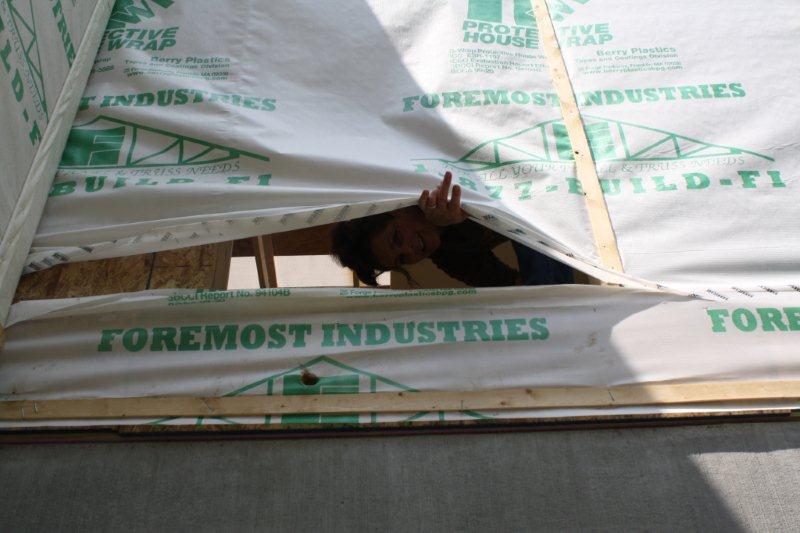
She's in!!!!
.
.
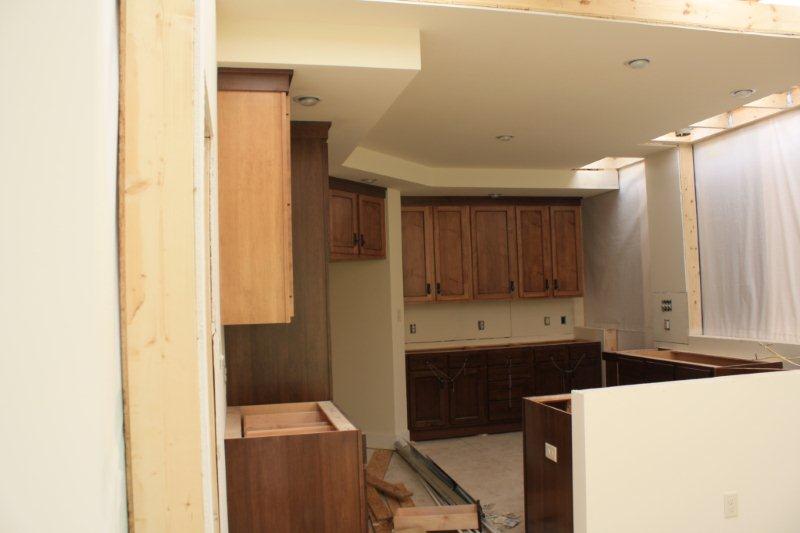
She can only get in the Kitchen and Sun Room (the hallway into the Foyer is
not in this module). So, what follows are some pictures of the Kitchen and Sun Room

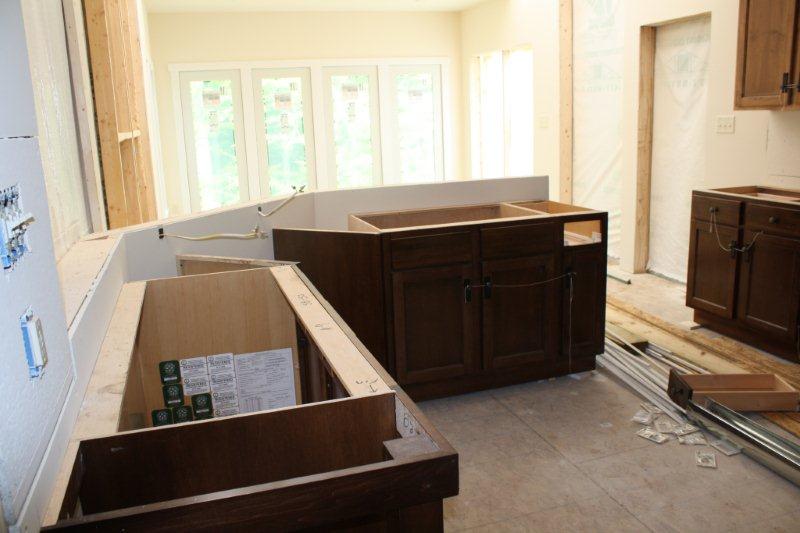
Standing in the Sun Room looking into the kitchen; You can see the
island in the foreground. All of the plastic on the right will come down and the kitchen
will be open to the Great room.
.
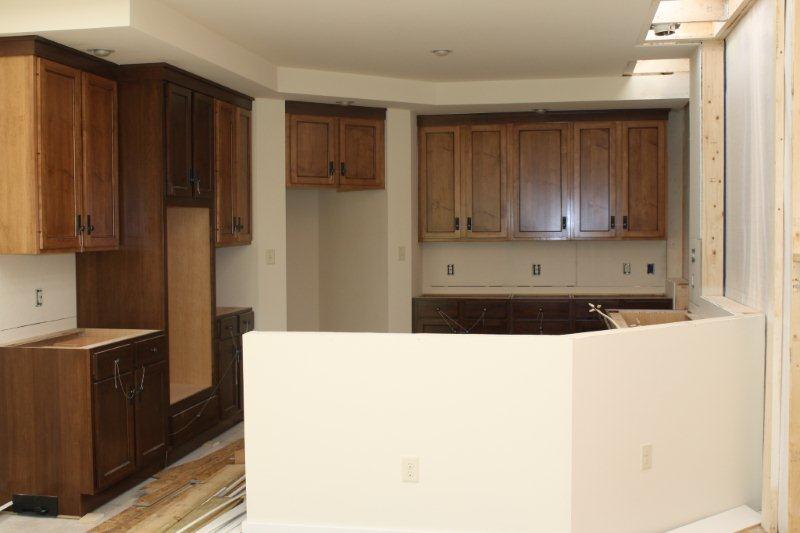
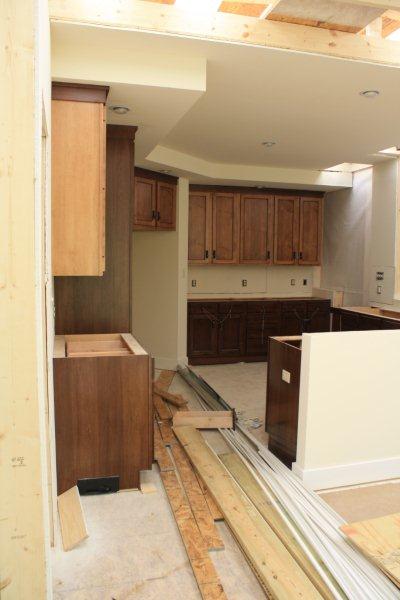
Standing on the other side of the Sun Room. You can pretty much
see the whole kitchen
.

Another view of the whole kitchen
.
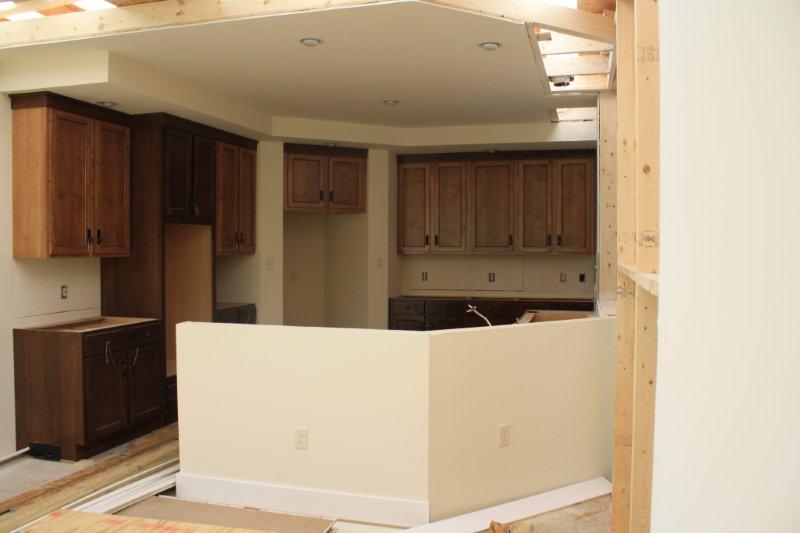
A view from a little farther back (or less zoon). The exposed
area top right gets fixed as part of the "tying together" of the modules
.
Another view for the other side (toward the deck side of the sun room)
.
...........................
Another view from the "deck side"
.
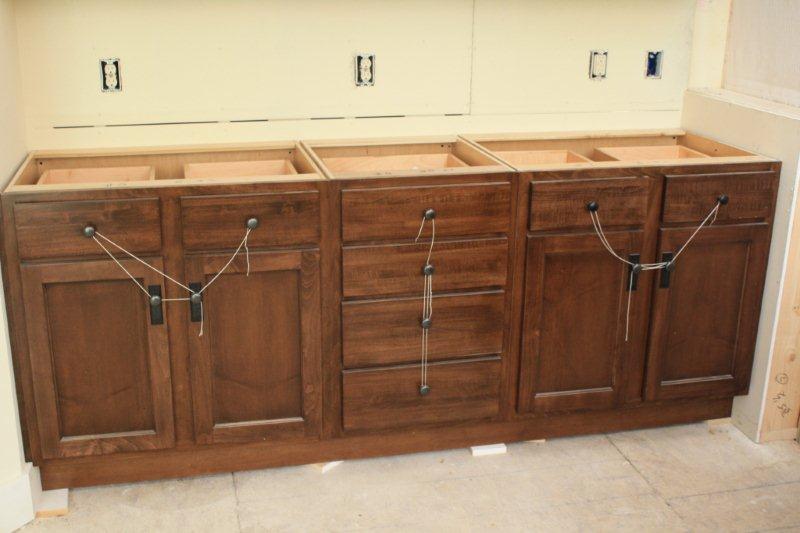
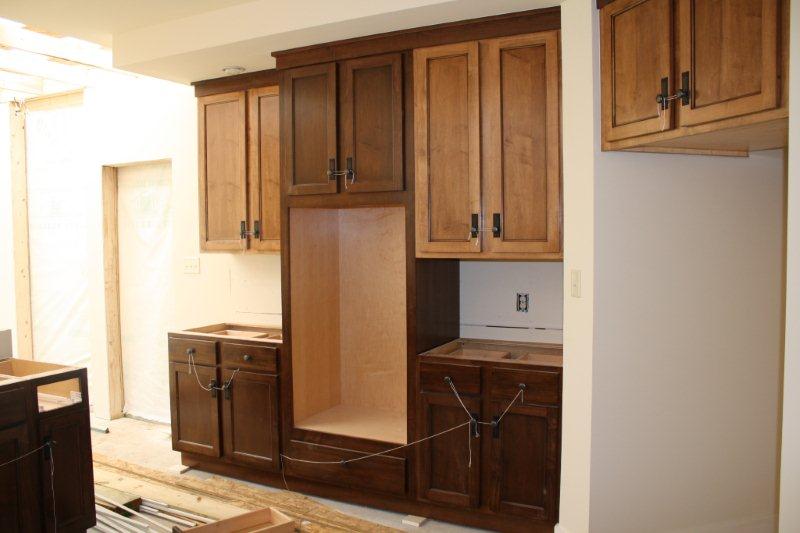
Close up of the base cabinets (just to the right of the refrigerator)
.
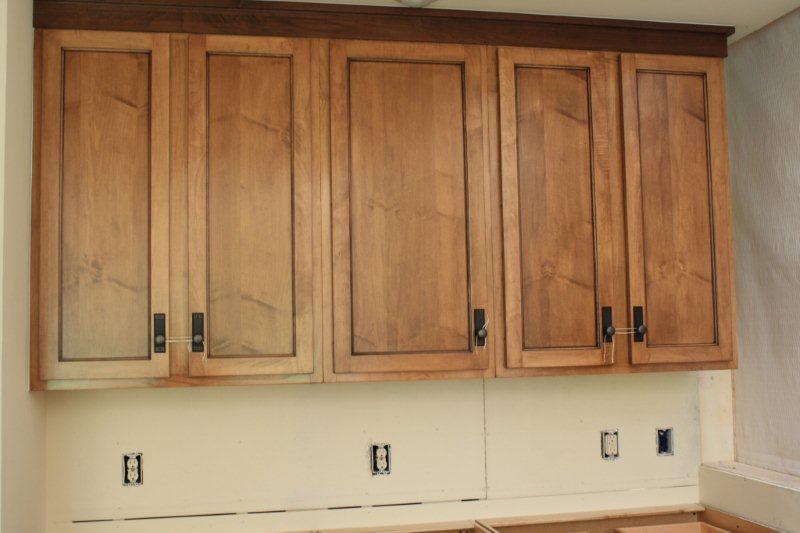
Close up of the upper cabinets (just to the right of the refrigerator)
.
.............
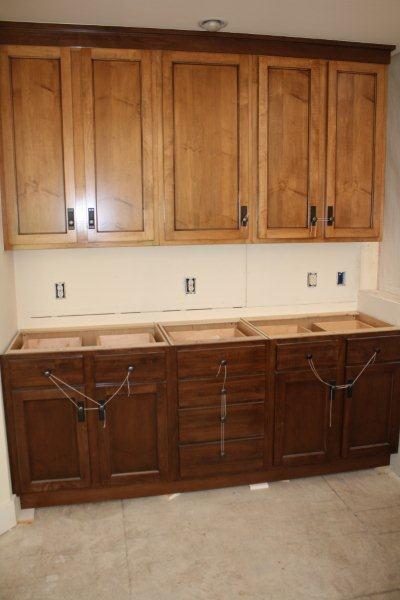
Both upper and lower cabinets together.
.
Cabinets to the left of the refrigerator
.
Standing in the kitchen; you can see the island cabinets and then the
Sun Room windows
.

Another view looking straigh out the Sun Room
.
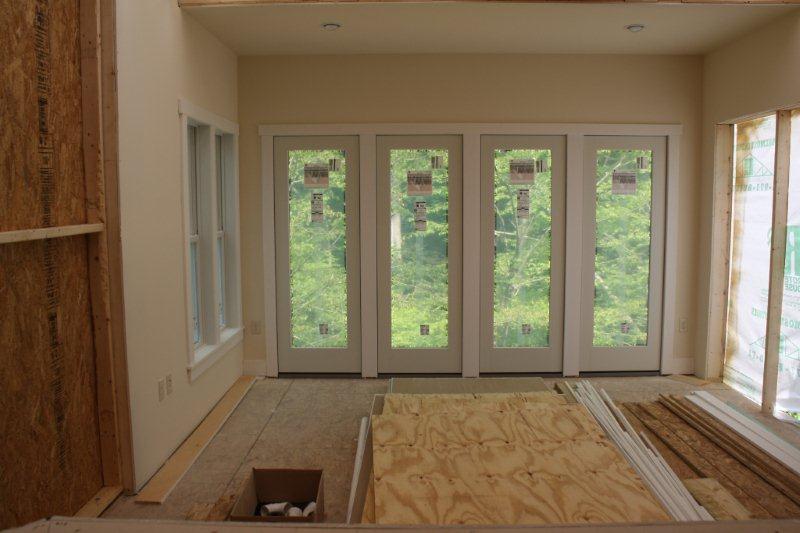
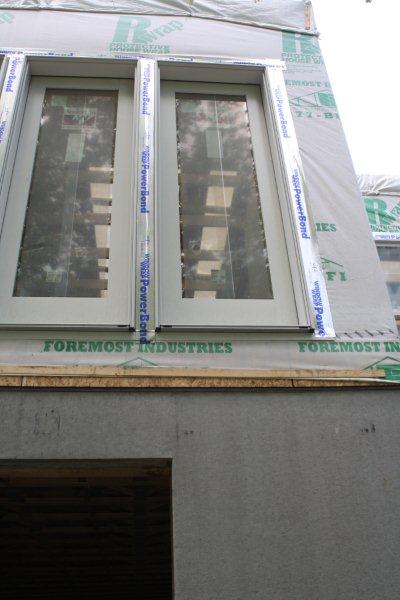
Close up on the Sun Room
.
----------------------------------------
.
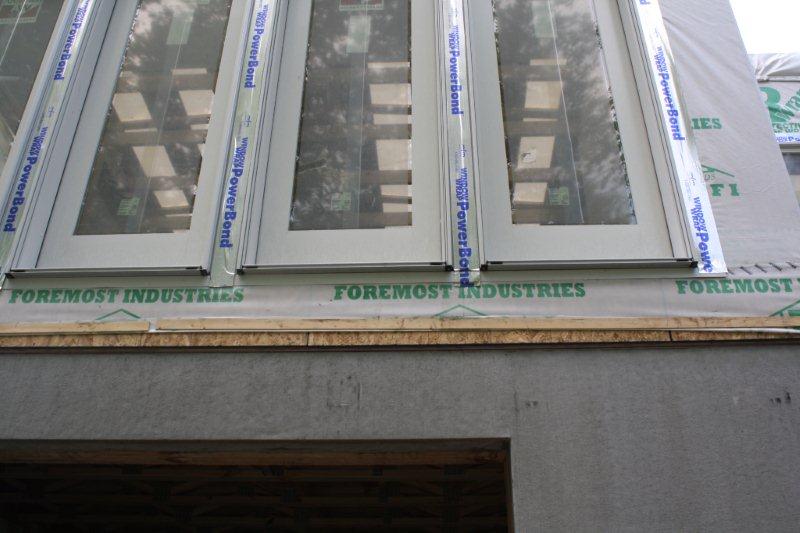
Standing just below the Sun Room looking up
.
...........................
Another view looking up at the Sun Room
.
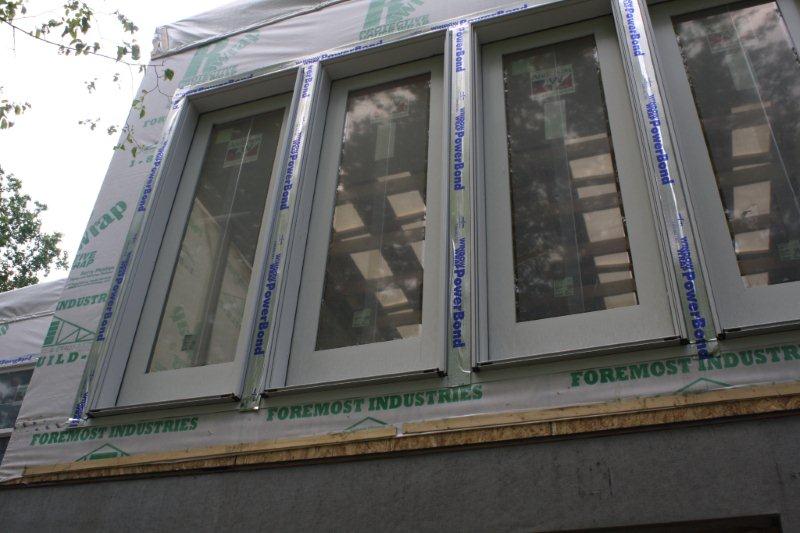
And one more view
.
----------------------------------------
.
Thats all of the pictures from 31 May - the next set of pictures are
on the Roof/Trusses button.
.
----------------------------------------
.